Source for troubleshooting and repair help with your appliances. Articles on Refrigerator, Washer, Dryer, Stove and Microwave service. Everything you need to do your own repairs on all brands of major appliances. All this help is free along with lots of useful videos to assist you. Help with repair, fix and replace.
Frigidaire Dryer Error Code "dr" - How to Troubleshoot, Fix and Repair
Hi guys, my name's Bill and in this Post I want to show you how to troubleshoot the DR code on your Frigidaire Dryer. When you press the start button after you've selected a cycle, the dryer should run, unless you've left the door open.
The DR code is telling you to close the door if you want the dryer to run.
But what's it mean if the door IS closed and it still flashes "DR" when you press the start button?
This is what we're going to troubleshoot in this Article.
For the motor relay on the control board to have power to send to the motor, a couple things have to be true. The thermal limiter cannot be tripped, the door has to be closed so power can travel from the common to the normally open terminal on the door switch, which goes to the motor relay. If you're getting the DR code then the Thermal limiter has to be OK, or the control board wouldn't have power at all. So it really only leaves the door switch to be the issue or a bad control board.
Here's a look at the wiring diagram for this Dryer. As you can see, power comes from the L1 terminal and goes through the thermal limiter to the common on the door switch. If the door is open, power will be routed from the switch to the drum light. If the door is closed, the power is then routed to the motor relay on the control board. Before we get into testing the switch, let's make sure that the door is closing properly. If the door isn't completely closed the door switch won't be activated and the dryer won't start.
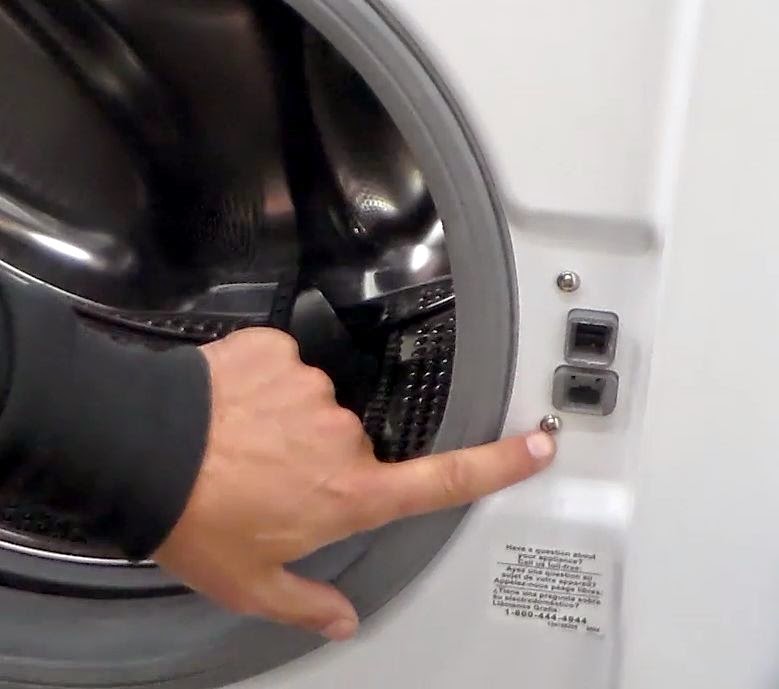
As you can see in the video below, when I press the start button, the DR code appears, but the door is closed. This is because the little door catch on top is broken and not holding the door closed enough to trigger the switch. Just a little pressure on the door, and the dryer starts up.
After you've eliminated this as your problem you can move on.
To determine if you have a bad switch or a bad control board, you'll need to test the switch. Just because you open the door and the light comes on, doesn't mean your switch is good. You still need to test between the COM and the NO to see if a connection is made when the door is closed properly.
Unplug the dryer from the wall and connect your meter to the COM and NO terminals on the door switch. Set your meter to OHMS. If you get an OL reading with the door closed, then the switch is bad and would need replaced. If you get the .1 reading with the door closed, the switch is good. If you get the DR code with a good switch and a properly closed door, then control board is bad and would need replaced.
Well that's it for this Post guys. If you are not Subscribed to my YouTube Channel, take a minute and do that now. Leave some comments for me to read or just say HI.
If you have not signed up for my giveaway, visit my website here and sign up, tell your friends about it so they have a chance to win too. Thanks for Reading.
Frigidaire Dryer Error Code List - Complete Error and Diagnostic Codes
Labels:
Frigidaire Dryer Error Code List
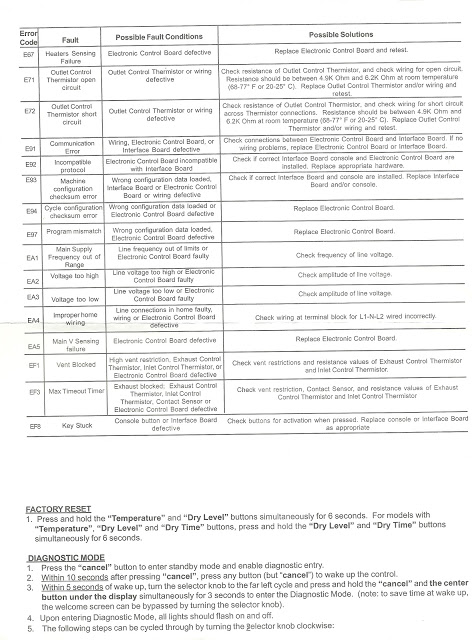
Here is a list of error codes for a Frigidaire Electric Dryer. This is a complete list of codes and what causes them. There is also tips on how to test for each code.
You will also see on this list the way to pull the error codes from the machine using the diagnostic mode of the dryer.
You will also see on this list the way to pull the error codes from the machine using the diagnostic mode of the dryer.
Click on the images below to see a larger view
- E31
- E32
- E42
- E51
- E52
- E53
- E54
- E61
- E63
- E64
- E65
- E66
- E67
- E71
- E72
- E91
- E92
- E93
- E94
- E97
- EA1
- EA2
- EA3
- EA4
- EA5
- EF1
- EF3
- EF8
Frigidaire Front Load Dryer Wiring Diagram
Labels:
wiring diagram
Frigidaire Front Load Dryer
Wiring Diagram for an Electric Dryer
This is the wiring diagram for a Frigidaire Front Load Electric Dryer. This diagram covers many models. Most of the mechanical functions on these dryers are the same. The difference in most is the electronic control board that you use to set the controls.
Kenmore Series Electric Dryer Wiring Diagram - Schematic
Labels:
wiring diag
This is a typical wiring diagram for a Kenmore Series Dryer. This diagram came from a 70 Series, but it will help with others including Whirlpool Dryers.
With this diagram you can trace back wiring to test for faulty parts.
Thanks for Taking a Look at the wiring diagram for Kenmore / Whirlpool Electric Dryers.
With this diagram you can trace back wiring to test for faulty parts.
Thanks for Taking a Look at the wiring diagram for Kenmore / Whirlpool Electric Dryers.
Error Codes and Diagnostic Codes for a Samsung Dryer
Here is a detailed list of error codes for a Samsung Dryer.
These will help you Troubleshoot your Dryer if you are having issues with it and it's showing an Error Code.
TS - Dryer Thermistor Short Sensed
TO - Dryer Thermistor Open Sensed
DO - Door Open
FE - Power Source Frequency Error
DF - Door Circuit Failure
HE - Heater Error
BE - Button Error
OD - Over Dry
ET - EEprom Fail
Wiring Diagram for a Kenmore Dryer - Full Wiring Schematic
Labels:
drain,
fix,
frigidaire,
front load,
GE,
Kenmore,
Maytag,
pump,
repair,
replace,
Samsung,
washer,
washing machine,
Whirlpool
Front Load Washer - Not Draining
How to Clean and Test the Drain Pump
 |
| Frigidaire Front Load Washer |
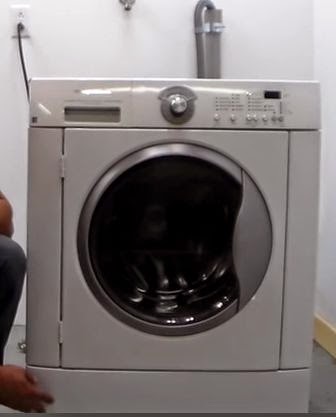
My name is Bill, today we are going to learn how to clean and test the drain pump on your front load washer. There are a few things we need to cover before you work on your front loader.
1. Safety of course
2. Common Sense
3. Pay close attention to detail
4. Patience
 |
| Lower Panel |
 |
| Removing Top of Washer |
 |
| Dispenser Removal |
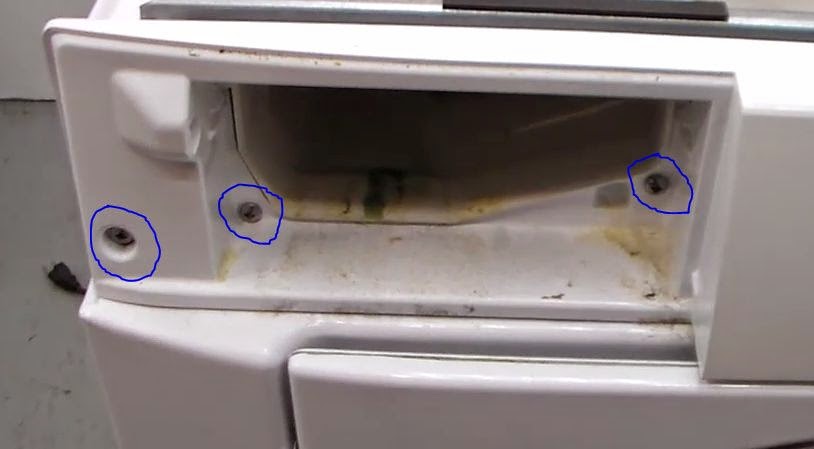 |
| Screws Behind Dispenser |
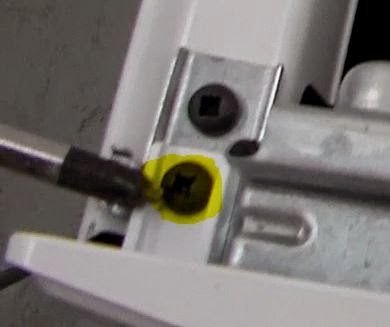 |
| Control Panel Screw |
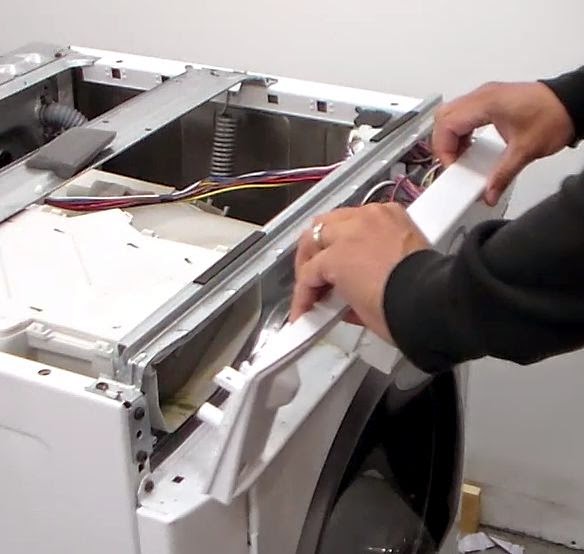 |
| Pulling off the Control Panel |
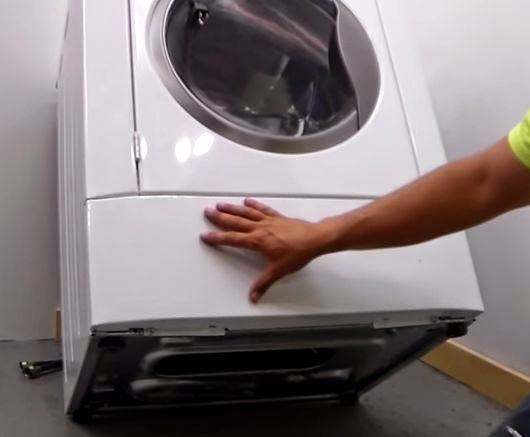
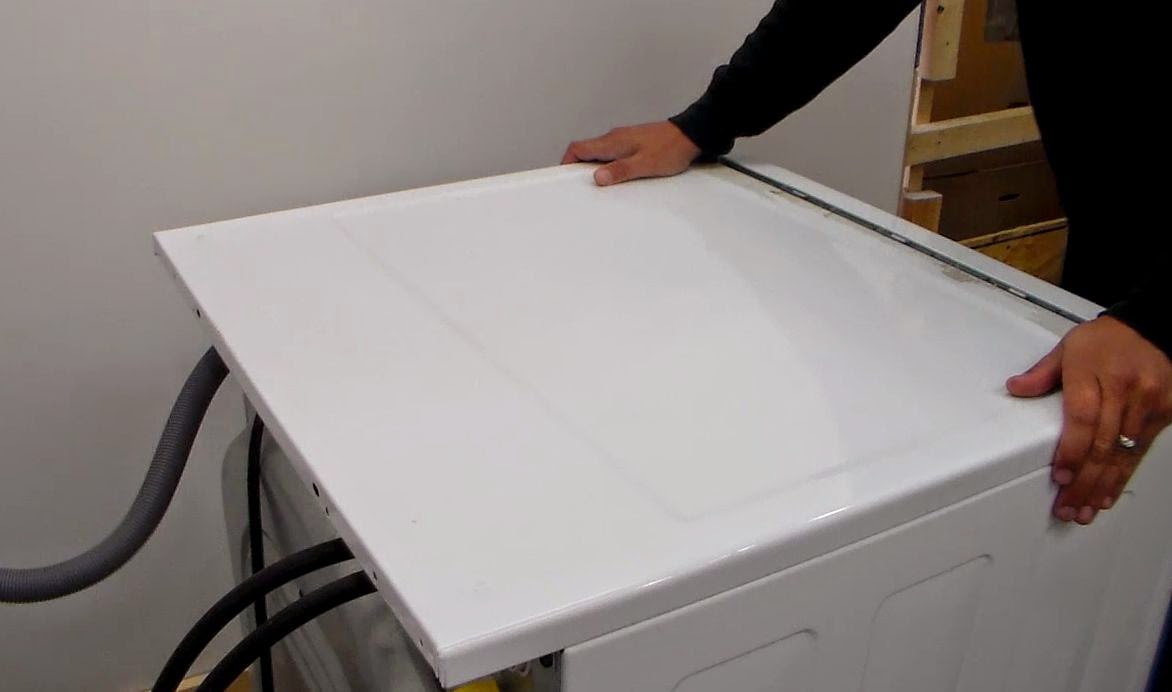
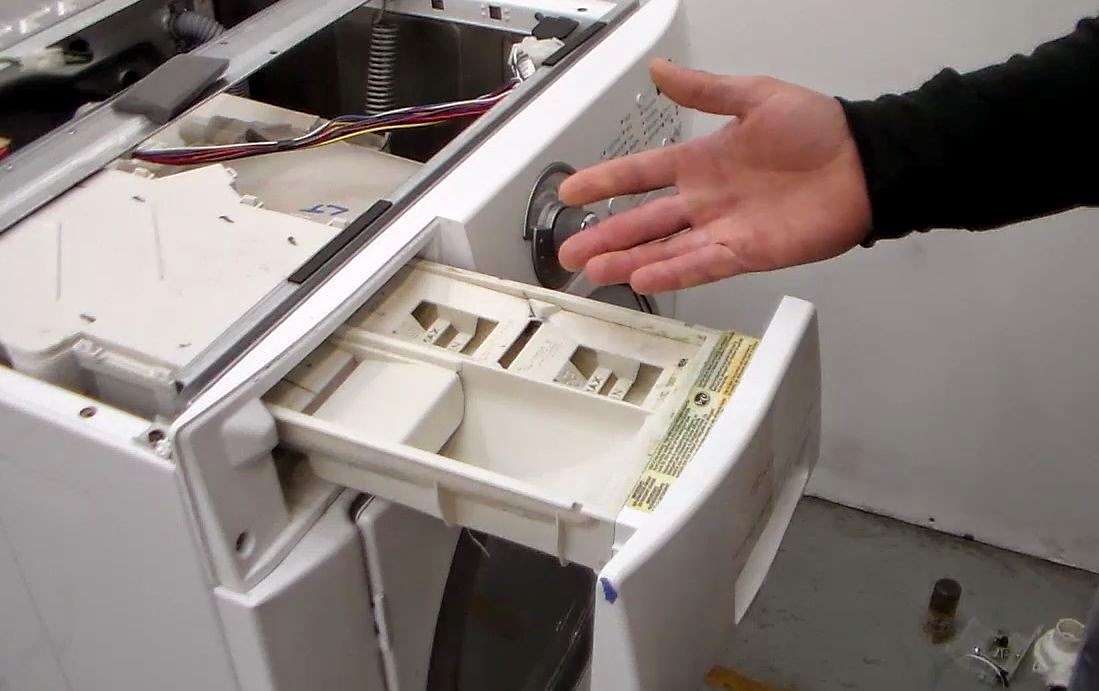
Now you are ready to take out the last few screws that hold the front of the washer on. There are going to be 5 in total. Three across the top and two at the bottom. Once they are out you can take off the front of the washer and begin accessing the drain pump on your washer.
Two things need to be done when you have a washer that is not draining. The first thing that needs to be done is cleaning the coin trap in the drain hose that leads to the drain pump. Most of the time this gets full of debris and prevents the washer from draining properly. This stops all sorts of items from actually getting into the pump and causing damage.
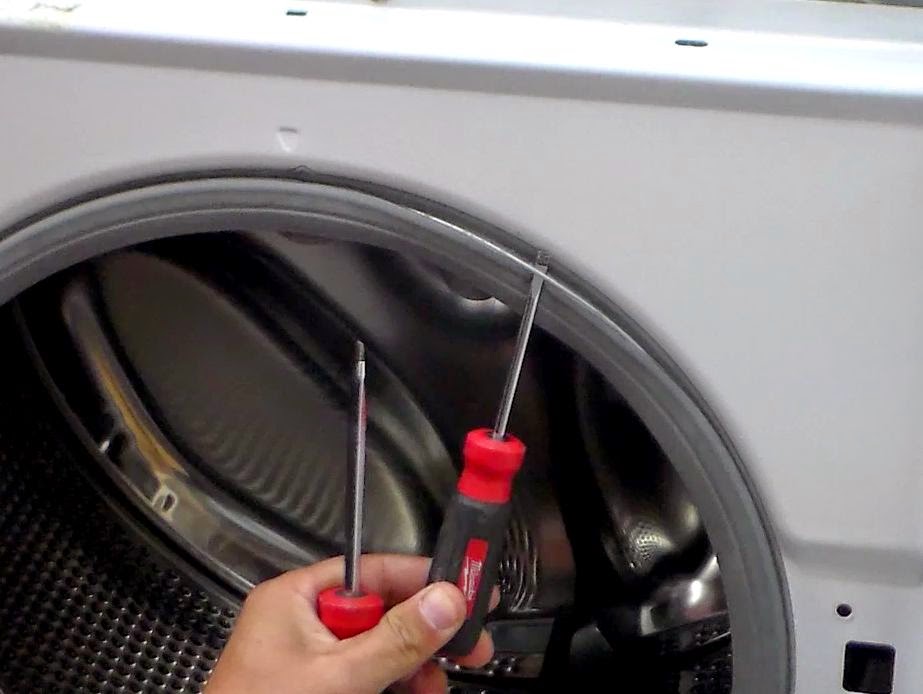 |
| Door Gasket Removal |
Once you have cleaned and tested your pump, you can put your washer back together and begin washing clothes.
Here are a couple YouTube Videos demonstrating How to Clean and How to Test your Drain Pump on a Front Load Washer. If you have read this article it is time for you watch the videos. The videos are on exactly what I have just talked about and they show you how to fix your washer in much better detail.
Stove Top Burner or Burners Not Lighting
Today we are going to talk a little about Gas Stove Burners. Every once in a while you run into an issue with 1 or more burners. Usually what I've found is that if one burner has stopped working, it doesn't get fixed. It's usually when the second one goes is when you start looking for information on how to fix it.
Well, right now you are going to learn the biggest reasons why your gas stove burners can stop working, how to troubleshoot them, and what you need to replace to fix the problem.
This will actually be pretty simple to get you back up and running. When you turner your gas burner knob to the light position, this sends a signal to the spark modulator, then the spark modulator sends the spark to the burners, easy enough right.
First thing we need to do is identify the problem that your having so I can tell you where to look. So here is example problem number one. When you turn the front right burner to light, nothing happens but you can hear the gas. All the rest of the burners work fine. Too make this easy, you have a bad ignitor wiring harness. This is the piece that goes around each burner valve and tells the spark modulator that you are in the light position on one of the burners. These come as an assembly, so if one is bad you end up replacing them for all your burner valves.
Here is example problem number two. When you try to turn on the front right left burner, all the other burners spark, except the front left. Well, you have a bad spark modulator. When it receives the signal from one of the burner valves that its time to light, it sends a spark to all the burners. Each burner has its own wire that comes from the spark modulator. Now you have one burner with no spark, some of these are wired together, so one wire will control the two left side burners and the other wire will control the two right side burners. If that's the case then if part of the spark modulator went bad then you would loose spark to half your burners. Got it?
OK, here is the last, but most common problem that you will have with your stove, I saved the best for last. Here are the symptoms of problem number three. You turn your burner to light, the burner you are trying to light has spark, but it won't light and you can light it with a match. This one is going to be just a little difficult to explain, but I will try my best. In the area of the burner where your see the spark, behind the little white piece there is a hole, this hole goes into the center of the burner. This is where the gas initially lights to light the whole burner. If that little hole gets plugged with grease and grim, the gas cannot get to the spark and light the fire. Usually a needle of some sort is what you would use to clean the hole. If you closely inspect this with a flashlight you will see what I'm talking about. I have a thin piece of wire that I carry with me when I'm out doing service just for this reason.
There you have it, hopefully with what you've learned in this post today, you are able to troubleshoot your range and have all your burners back up and working like they are supposed too. Please take a minute to leave a comment telling me how you made out with your stove. If you watched the video on this post, hit the "LIKE" button on the video, that helps out alot.
Thanks Again and Good Luck with your Repair!
Well, right now you are going to learn the biggest reasons why your gas stove burners can stop working, how to troubleshoot them, and what you need to replace to fix the problem.
This will actually be pretty simple to get you back up and running. When you turner your gas burner knob to the light position, this sends a signal to the spark modulator, then the spark modulator sends the spark to the burners, easy enough right.
First thing we need to do is identify the problem that your having so I can tell you where to look. So here is example problem number one. When you turn the front right burner to light, nothing happens but you can hear the gas. All the rest of the burners work fine. Too make this easy, you have a bad ignitor wiring harness. This is the piece that goes around each burner valve and tells the spark modulator that you are in the light position on one of the burners. These come as an assembly, so if one is bad you end up replacing them for all your burner valves.
Here is example problem number two. When you try to turn on the front right left burner, all the other burners spark, except the front left. Well, you have a bad spark modulator. When it receives the signal from one of the burner valves that its time to light, it sends a spark to all the burners. Each burner has its own wire that comes from the spark modulator. Now you have one burner with no spark, some of these are wired together, so one wire will control the two left side burners and the other wire will control the two right side burners. If that's the case then if part of the spark modulator went bad then you would loose spark to half your burners. Got it?
OK, here is the last, but most common problem that you will have with your stove, I saved the best for last. Here are the symptoms of problem number three. You turn your burner to light, the burner you are trying to light has spark, but it won't light and you can light it with a match. This one is going to be just a little difficult to explain, but I will try my best. In the area of the burner where your see the spark, behind the little white piece there is a hole, this hole goes into the center of the burner. This is where the gas initially lights to light the whole burner. If that little hole gets plugged with grease and grim, the gas cannot get to the spark and light the fire. Usually a needle of some sort is what you would use to clean the hole. If you closely inspect this with a flashlight you will see what I'm talking about. I have a thin piece of wire that I carry with me when I'm out doing service just for this reason.
Thanks Again and Good Luck with your Repair!
How Much Power Does a Refrigerator Use
Labels:
electricity,
energy,
frigidaire,
GE,
Kenmore,
Maytag,
power,
refrigerator,
usage,
watts,
Whirlpool
Today's post is going to be on a question that I get asked almost on a daily basis.
Well I'm going to try to help give you a general idea on that.
I tested a couple refrigerators I had at the shop today and this is what I found. Most refrigerators that are over ten years old are running about 200 watts of electricity when the compressor and fans are running.
Most newer refrigerators within the last five years or so are running anywhere from about 125 - 140 watts of electricity.
Now the compressor and the fans are going to cycle on and off throughout the day. On average the refrigerator will run roughly 50% of the time. So using the numbers above, an older refrigerator is like leaving a 100 watt light on in your house 24 hours a day. Newer refrigerators are like leave a 60 - 70 watt light on 24 hours a day.
Newer refrigerators are definitely more energy efficient that older ones. Other factors that will affect these numbers are of course going to be the lights in the refrigerator. They use power when you open the doors. Another thing that will affect energy usage is the defrost cycles of the machines. On newer refrigerators the defrost cycles are run only when they are needed instead of every 8 hours or so. This will result in some energy savings over the course of a year. Most defrost heaters will draw about 300 watts of power when they are on.
Thanks for taking the time to read this post today. The video below shows me doing some tests on the refrigerators that I was talking about in this post. If you could hit the "LIKE" button on the video, this helps me out. If you have any questions about this or anything else for that matter, leave them in the comment section on this blog or in the comment section on the video. Thanks again for taking the time and have a good day!
How much Electricity or Energy does my refrigerator use?
Well I'm going to try to help give you a general idea on that.
I tested a couple refrigerators I had at the shop today and this is what I found. Most refrigerators that are over ten years old are running about 200 watts of electricity when the compressor and fans are running.
Most newer refrigerators within the last five years or so are running anywhere from about 125 - 140 watts of electricity.
Now the compressor and the fans are going to cycle on and off throughout the day. On average the refrigerator will run roughly 50% of the time. So using the numbers above, an older refrigerator is like leaving a 100 watt light on in your house 24 hours a day. Newer refrigerators are like leave a 60 - 70 watt light on 24 hours a day.
Newer refrigerators are definitely more energy efficient that older ones. Other factors that will affect these numbers are of course going to be the lights in the refrigerator. They use power when you open the doors. Another thing that will affect energy usage is the defrost cycles of the machines. On newer refrigerators the defrost cycles are run only when they are needed instead of every 8 hours or so. This will result in some energy savings over the course of a year. Most defrost heaters will draw about 300 watts of power when they are on.
Thanks for taking the time to read this post today. The video below shows me doing some tests on the refrigerators that I was talking about in this post. If you could hit the "LIKE" button on the video, this helps me out. If you have any questions about this or anything else for that matter, leave them in the comment section on this blog or in the comment section on the video. Thanks again for taking the time and have a good day!
Refrigerator Not Cooling - What to Check
Labels:
Compressor,
defrost,
diy,
frigidaire,
frost in freezer,
GE,
Kenmore,
KitchenAid,
Maytag,
no cool,
not cooling,
refrigerator,
Refrigerators,
repair,
troubleshooting,
Whirlpool
Today we are going to talk a little about Troubleshooting a Refrigerator that is not getting cold and a few things to check to get you going in the right direction in repairing the problem.
There are a couple things that need to happen for your refrigerator to get cold. The compressor has to run, the evaporator fan has to move the air around the refrigerator to cool down the entire inside of your fridge and freezer. There are a couple components on your refrigerator that are going to control when the compressor and the fan run. One being the defrost timer, the other being the thermostat or also called the cold control. I have made a couple videos explaining how to test each one of these parts and what they look like to help guide you along in your repair. I am still going to try to explain a basic walk through of what I would do if I was at your house.
The first thing I would check to make sure the Refrigerator was getting the proper voltage. If you open up the refrigerator and the light is on, we can move on. If you don't have a light inside the refrigerator, test the outlet that the fridge is plugged into and make sure that there is voltage at the plug in the neighborhood of 120VAC. Now that we have gone over that lets move on.
If your fan is not running, check the compressor. It is the black round motor in the back of the refrigerator that pumps the freon through the sealed system. Is the compressor running? If the compressor is running and the fan is not running we need to check the evaporator fan first. If the compressor is not running we need to check the defrost timer and the thermostat first.
First thing I'm going to go over is checking the evaporator fan. Most fans inside your freezer are 120 VAC fans. When the compressor is running the fan will also be receiving voltage at the same time. You are going to need to access the evaporator fan for this test. At this point you are going to want to unplug the refrigerator from the wall and remove the back panel of your freezer. You are going to need to access the evaporator fan motor. The first test is going to be seeing if the fan is good or bad. With the refrigerator unplugged from the wall, remove the wires that are plugged into the fan and test the resistance across the two terminals on the fan motor. You should not read and open circuit. Normally you should read something like 100 to 125 ohms or so. If you test the fan and have an open circuit, the fan is bad and will need replaced. For the next test with the fan we are going to see if the fan motor is getting the correct voltage when the compressor is running. From here you are going to place your meter on VAC so we can test the current going to to fan. So plug the fridge back in and test the wires going to the fan motor. Make sure you can hear the compressor running when you do this test. If you hear the compressor running and the fan is not getting 120 volts, the defrost timer is bad. If your refrigerator does not have a defrost timer but has an ADC board, then its bad. The ADC board and the Defrost timer do basically the same thing. One is mechanical the other works off a control board.
Moving on, now we are going to run some tests for a refrigerator that the compressor and the evaporator fan are not running. You are going to want to first locate the defrost timer on your machine. The first check is going to be to see if it's stuck in defrost. The fridge will go into defrost about 3 times a day. So for around 30 minutes the compressor and the fan are shut down and the heater is turned on in the freezer to clear the frost and ice off the coils behind the rear panel. The refrigerator does this to make sure that the cold freezer air can easily circulate throughout the whole unit, keeping everything cold. Now for the test, grab yourself a flat head screwdriver and find the dial on the defrost timer. You want to turn the dial clockwise. You will hear some clicking as the timer moves. There are two distinct clicks, first one being the timer entering defrost mode and the second distinct click coming out of the defrost cycle. If the compressor and fan come on when you turn the dial, great, now you know that you have a bad defrost timer. Now if that didn't make the fan and compressor come on then we have to test the thermostat. The thermostat will also shut down the fridge when it reaches the correct temperature. However if its defective, then it will shut down the goodies when it's not supposed to. How to test the thermostat is pretty simple. Unplug the fridge from the wall, remove the two wires that plug into the thermostat. With the thermostat set to the factory setting, the midway point or so, test the resistance across the two terminals. If the thermostat is bad, it will read an open circuit. If the thermostat is reading a closed circuit, then the timer is bad and not letting any voltage reach either the fan or the compressor.
Thanks for taking the time to read this post and watch some videos. I hope that the information in here has helped you locate the problem with your refrigerator and you are able to fix it. If you have any questions or need some more help, I try to answer all my comments on my posts, either with a new post or in the comments themselves, so leave a comment with any questions you have or let me know if this helped you out. Make sure you thumbs up the videos and add them to your favorites, that helps me out alot.
Good Luck with your repair, I hope I was able to save you some money by you not having to call out a professional.
There are a couple things that need to happen for your refrigerator to get cold. The compressor has to run, the evaporator fan has to move the air around the refrigerator to cool down the entire inside of your fridge and freezer. There are a couple components on your refrigerator that are going to control when the compressor and the fan run. One being the defrost timer, the other being the thermostat or also called the cold control. I have made a couple videos explaining how to test each one of these parts and what they look like to help guide you along in your repair. I am still going to try to explain a basic walk through of what I would do if I was at your house.
The first thing I would check to make sure the Refrigerator was getting the proper voltage. If you open up the refrigerator and the light is on, we can move on. If you don't have a light inside the refrigerator, test the outlet that the fridge is plugged into and make sure that there is voltage at the plug in the neighborhood of 120VAC. Now that we have gone over that lets move on.
On a no cool refrigerator after I have determined that power is not an issue, the next thing I would do is open up the freezer door. There are a couple things that we are going to look for. First thing you are going to want to listen for is the fan inside the freezer. If the fan is running, good, if not, we have to figure out why the fan is not running. The two parts we talked about earlier are in control of the freezer fan.
Thanks for taking the time to read this post and watch some videos. I hope that the information in here has helped you locate the problem with your refrigerator and you are able to fix it. If you have any questions or need some more help, I try to answer all my comments on my posts, either with a new post or in the comments themselves, so leave a comment with any questions you have or let me know if this helped you out. Make sure you thumbs up the videos and add them to your favorites, that helps me out alot.
Good Luck with your repair, I hope I was able to save you some money by you not having to call out a professional.
How to Clean a Smooth Top Stove - #1 Best Way
Today we are going to talk about cleaning your glass top stove. Too many times I will run a service call on someones appliance, other than the stove, and notice how dirty or stained up their glass top range is. Every single day I end up giving someone a cleaning lesson on how to keep their cooktop looking brand new for years to come. Of all the stoves that I've cleaned for people, one thing I have found out is, nobody does it like I do. Not sure why. It is actually a very simple process.
The next most important cleaning supply you are going to need is a green scotch brite pad. These are very cheap and readily available pretty much anywhere. There is no reason to not have a box or two of these around. These are very effective for cleaning off burnt grease and and water stain marks. Don't even think about using your washcloth. It does not have the scrubbing power. The glass top on your stove will be just fine. You will not hurt it at all.
Number three is going to be a razor blade scraper. You will need this if you have not kept up with your cooktop cleaning duties. I can tell you right now that you will not be able to properly clean your stove without one of these. So make sure you have one when you are ready to begin. You would be surprised of how many people don't realize or are afraid to use a razor blade on their stove. Now you know that it is OK, let's move on to the last thing you will need.
The last supply that you are going to want to have are some paper towels. You will need precisely two full sheets. Do not use the paper towels that feel like cloth. They may work for other cleaning purposes, but not for this. Just trust me on this, they suck for this job. Cheap paper towels work the best. This is based off me cleaning hundreds of stove tops for people as a courtesy.
Now that you know what you need, let me tell you how to accomplish this mission. Make sure that you are not cleaning your stove when the top is still hot from cooking. Let it cool before you begin.
Step one is going to be applying the cooktop cleaner. You want to use a generous amount to make sure that you can rub on a thick coat of this stuff. Step two is going to be to use your green scotch brite pad to rub and scrub as much grease and grim off the cooktop as you can. While the cleaner is spread around this is where you want to razor blade the areas that will not scrub off. Once you have gotten off all the grease and grim that you can, its time to buff it clean. Use a paper towel or clean rag to wipe off most of the excess cleaner. You want to leave a thin coat still on the top. This thin coat will haze over. After it hazes over, go ahead and use a clean part of your rag or a new paper towel to finish buffing the top to a shine.
This method will work every time. This should be the only way that you clean the top of your stove. I am without a doubt sure that if you clean it like this regularly, your top will look brand new the entire time you own your glasstop stove.
Make sure you watch the video on this page. This is me giving a demonstration on what this article is about. Give the video a thumbs up on YouTube. Leave some comments if you have any questions or just want to say something. I do my best to respond to every comment left on my YouTube channel. Thanks for taking the time to read and watch this. Good Luck with your new cooktop or your dirty cooktop that is going to look its best in years.
To read more on Caring for you Stove follow this link.
You want to think of the smooth top on your stove like the paint on your car. You must clean and protect it from dirt, grease and grime. Regular cleaning is an absolute must when you own one of these. There is no way around it. But, if you want it to look like garbage, then stop reading now. If you are interested in keeping your cooktop looking like its brand new, read on my friend.
There are a couple of supplies that you are going to need to begin. Number one being being cooktop cleaner. Whether it's generic or Cerama Bryte or whatever, you will need this. Do not use anything else other than cooktop cleaner. Stop using Windex, bleach water, soapy water or whatever home concoction you have been using. By using these products you are making cleaning your glass top much harder than what it really needs to be. Seriously.
The next most important cleaning supply you are going to need is a green scotch brite pad. These are very cheap and readily available pretty much anywhere. There is no reason to not have a box or two of these around. These are very effective for cleaning off burnt grease and and water stain marks. Don't even think about using your washcloth. It does not have the scrubbing power. The glass top on your stove will be just fine. You will not hurt it at all.
Number three is going to be a razor blade scraper. You will need this if you have not kept up with your cooktop cleaning duties. I can tell you right now that you will not be able to properly clean your stove without one of these. So make sure you have one when you are ready to begin. You would be surprised of how many people don't realize or are afraid to use a razor blade on their stove. Now you know that it is OK, let's move on to the last thing you will need.
The last supply that you are going to want to have are some paper towels. You will need precisely two full sheets. Do not use the paper towels that feel like cloth. They may work for other cleaning purposes, but not for this. Just trust me on this, they suck for this job. Cheap paper towels work the best. This is based off me cleaning hundreds of stove tops for people as a courtesy.
Now that you know what you need, let me tell you how to accomplish this mission. Make sure that you are not cleaning your stove when the top is still hot from cooking. Let it cool before you begin.
Step one is going to be applying the cooktop cleaner. You want to use a generous amount to make sure that you can rub on a thick coat of this stuff. Step two is going to be to use your green scotch brite pad to rub and scrub as much grease and grim off the cooktop as you can. While the cleaner is spread around this is where you want to razor blade the areas that will not scrub off. Once you have gotten off all the grease and grim that you can, its time to buff it clean. Use a paper towel or clean rag to wipe off most of the excess cleaner. You want to leave a thin coat still on the top. This thin coat will haze over. After it hazes over, go ahead and use a clean part of your rag or a new paper towel to finish buffing the top to a shine.
This method will work every time. This should be the only way that you clean the top of your stove. I am without a doubt sure that if you clean it like this regularly, your top will look brand new the entire time you own your glasstop stove.
Make sure you watch the video on this page. This is me giving a demonstration on what this article is about. Give the video a thumbs up on YouTube. Leave some comments if you have any questions or just want to say something. I do my best to respond to every comment left on my YouTube channel. Thanks for taking the time to read and watch this. Good Luck with your new cooktop or your dirty cooktop that is going to look its best in years.
To read more on Caring for you Stove follow this link.
Washer Overflowing / Overfilling How to Fix
Labels:
90 series,
Amana,
diy,
Electrolux,
frigidaire,
GE,
how to,
Kenmore,
KitchenAid,
Maytag,
overflow,
pressure switch,
repair,
Roper,
Samsung,
troubleshooting,
washer,
Whirlpool
So the problem is you loaded up your washer, turned the dial to start, then you flooded your laundry room. That is never a good day. Lets talk a little about what happened and how to troubleshoot this problem to find out what malfunctioned on your washer to let this happen.
There are a couple things that control the water coming into your washer. The first thing is going to be the water inlet valve. Basically how this works is you set the washer to fill with either hot, warm or cold water. When you turn the timer on, the temperature selector switch is going to tell which valve to open and let the water in. The timer only says it needs water, the temperature selector switch controls which valve lets it in. Basically the water valve is going to get 120 VAC, the solenoid will open and water will flow.
Normally when a water valve goes bad it will not let water in at all when it receives the voltage from the temp switch. However, it is possible that the valve has stuck open and is not able to close when the voltage is removed. You will know if the valve is stuck open because the only way you will get the water to stop going into the washer is to shut the water supply off to the washer. So to make this clear, you will be able to unplug the washer from the wall and water will continue to flow into the machine if the water supply is turned on. Got it?
Now, if you push the timer knob in and the water stops flowing into the washer you have a different problem than what we just went over. This check is going to bring your attention to the pressure switch and the pressure switch hose. The pressure switch is going to be whats attached to the load size knob. How this works is, as the washer fills with water, air gets trapped inside the pressure switch hose. As the water level rises the pressure inside the hose becomes greater. So if you set the washer to a small load, it only takes a little pressure inside the hose to tell the pressure switch to cut the water off and tell the timer to agitate. If you set the load size for a large load, it will take a lot more pressure for the pressure switch to cut the water and tell the timer to move on. The pressure switch hose is attached to the bottom of the wash tub and runs up and connects to the pressure switch.
Let's say you overloaded your washer and it was banging around and you didn't catch it right away. You hear the machine going nuts, run down fix the load so its balanced and bounce. The washer still has to go through a rinse cycle or two. Because your machine was off balance and shoot violently, it could have ripped off the pressure switch hose that's attached to the bottom of the tub. Now air cannot be trapped inside the tube and your pressure switch is not going to have any idea how much water is in there.
Sometimes the a hole can develop in the hose from rubbing on the frame somewhere over years of use. If that happens that will leave out the pressure and you'll overflow your washer. If you have a problem with the switch or hose, the water will shut off to the washer simply by pressing in on the timer knob.
Please make sure you watch the video on this page. This is me explaining what I've gone over here in this article. Plus you get to see how to troubleshoot each part on your washer so you'll be able to tell if the hose is bad, or if the valve is bad and how to diagnose each part the controls the flow of water in your washer.
The last thing you want to have is a washer that overflows, but if you did and that's what brought you hear, I hope I was able to help you solve your problem and point you in the right direction getting you washer back up and running like it should be.
Be sure to give the video a "Thumbs UP" hit the "LIKE" button. Leave some comments either on this post or on the videos main page. I will do my best to answer your questions. Thanks for taking the time to read this and good luck with your Appliance Repair!
There are a couple things that control the water coming into your washer. The first thing is going to be the water inlet valve. Basically how this works is you set the washer to fill with either hot, warm or cold water. When you turn the timer on, the temperature selector switch is going to tell which valve to open and let the water in. The timer only says it needs water, the temperature selector switch controls which valve lets it in. Basically the water valve is going to get 120 VAC, the solenoid will open and water will flow.
Now, if you push the timer knob in and the water stops flowing into the washer you have a different problem than what we just went over. This check is going to bring your attention to the pressure switch and the pressure switch hose. The pressure switch is going to be whats attached to the load size knob. How this works is, as the washer fills with water, air gets trapped inside the pressure switch hose. As the water level rises the pressure inside the hose becomes greater. So if you set the washer to a small load, it only takes a little pressure inside the hose to tell the pressure switch to cut the water off and tell the timer to agitate. If you set the load size for a large load, it will take a lot more pressure for the pressure switch to cut the water and tell the timer to move on. The pressure switch hose is attached to the bottom of the wash tub and runs up and connects to the pressure switch.
Let's say you overloaded your washer and it was banging around and you didn't catch it right away. You hear the machine going nuts, run down fix the load so its balanced and bounce. The washer still has to go through a rinse cycle or two. Because your machine was off balance and shoot violently, it could have ripped off the pressure switch hose that's attached to the bottom of the tub. Now air cannot be trapped inside the tube and your pressure switch is not going to have any idea how much water is in there.
Sometimes the a hole can develop in the hose from rubbing on the frame somewhere over years of use. If that happens that will leave out the pressure and you'll overflow your washer. If you have a problem with the switch or hose, the water will shut off to the washer simply by pressing in on the timer knob.
Please make sure you watch the video on this page. This is me explaining what I've gone over here in this article. Plus you get to see how to troubleshoot each part on your washer so you'll be able to tell if the hose is bad, or if the valve is bad and how to diagnose each part the controls the flow of water in your washer.
The last thing you want to have is a washer that overflows, but if you did and that's what brought you hear, I hope I was able to help you solve your problem and point you in the right direction getting you washer back up and running like it should be.
Be sure to give the video a "Thumbs UP" hit the "LIKE" button. Leave some comments either on this post or on the videos main page. I will do my best to answer your questions. Thanks for taking the time to read this and good luck with your Appliance Repair!
Kenmore / Whirlpool Washer Not Spinning
Kenmore / Whirlpool Washer Not Spinning
Today's post is going to be about Kenmore and Whirlpool Washers. These washers are probably one of the most popular and well built machines on the market today. So much so that if you were to buy a Maytag washer at the time of this post, it's actually a Whirlpool built washer. They haven't changed the way they are made in almost 15 years. That should tell you something right there. So let's move on.
When your Direct Drive washer is not spinning, there are a couple things that you are going to want to check. First thing being the Lid Switch. Basically when you have a problem with the lid switch, the washer will fill up, then stop. It will not Wash, Agitate or Spin.
The next check is going to be the Motor Coupler. This is the plastic gear like piece that connects the motor to the transmission. When this part breaks, your washer will sound like its trying to spin, but won't actually be spinning. Most of the time a quick peek up under the machine will help you determine whether that is bad or not.
So lets say the switch and the coupler are fine. This is the main reason for this post here. I haven't really found any good videos on how to check the clutch on a Kenmore or Whirlpool Washer. So, I decided to make one. This troubleshooting tip is specifically for a washer that sounds like its spinning, but it's not. Changing the clutch on your washer is not going to be that hard of a job. All you need to do is pay close attention to the video and you will be just fine.
I always tell people when I'm out doing service, this is one machine that if it does break, get it fixed. Do not get rid of it. The parts for these washer are readily available and relatively easy for the average homeowner to repair. All you guys need is some help with troubleshooting so your replacing the right parts.
Make sure you follow my Blog here and also Subscribe to my YouTube Channel, ApplianceOutlet. Leave some comments on the video, and make sure to add it to your favorites. Thanks for taking the time to read this and check out the video. I check my comments almost daily, so feel free to ask for some help or request a video for me to do. I have access to tons of appliances, so it's likely I can show you what you need to see to tell you what you need to know to help out. Again, Thanks!
Dryer Not Drying or Taking Too Long To Dry
Labels:
dryer,
Kenmore,
troubleshooting,
Whirlpool
Dryer Tips and Troubleshooting - Cleaning your Dryer
Today I want to help you troubleshoot your dryer that is taking too long to dry your clothes.
When a dryer is taking too long to dry, people usually think that their dryer is about to go, or the heating element is wore out. Most of the time this indicates an airflow issue. Airflow issues with dryers can also cause the safety thermostat to trip or the thermal fuse to blow. Usually when one of these two parts go out, it's caused by one of the three things that i'm going over today.
The first thing I want to cover is your lint filter. It is very important that you clean your dryer's lint filter before each load of clothes you dry. You would be surprised how many people don't do this. The lint filter is where the hot damp air needs to pass through before it leaves your dryer. If the lint filter is blocked up, air can't pass through it and your clothes aren't going to dry very well.
The second thing I want to cover is your dryer vent hoses. I would recommend having them cleaned at least once a year. Over time the inside of the hose will build up with lint. This lint build up will cause the air inside the venting to slow down causing poor dry times. If the dryer venting is longer than 10 feet, you might want to clean them out every six months or so. Depending on how and where your venting is run, that's going to determine how you need to clean them out. One thing you need check regularly, maybe every month or so is where the venting leaves the house. You want to make sure the flap on the outside of your house is able to completely open up when the dryer is turned on. Plus, make sure an animal didn't build a nest in there.
The last thing I want to cover is the dryer itself. This is just as important as the first two that i've covered. If you want to keep your dryer running effieciently you have to clean the inside of your dryer too. I'm not talking about where you put the clothes, but inside where you can't see. The dryer isn't exactly air tight, so if you have some sort of venting issue, lint will accumulate inside the dryer and cause other problems, including dryer fires. Over time the lint will accumulate inside the bottom of your dryer and basically cover all the components with a thick layer of lint. This can cause the motor to overheat and eventually stop working. Lint can also build up on the pulleys and rollers causing them to not spin freely and you could be replacing dryer belts more frequently then you need too.
Lately my wife has been telling me that our dryer is taking forever to dry our clothes. So I'm going to take this opportunity to show you guys how to clean the inside of your dryer. I have an Electric Kenmore dryer, so this will apply to most all Kenmore, Whirlpool and Roper Dryers. This Video below is basically me reading this page and showing you what you need to do and check. Remember to use common sense when attempting to do your own repairs.
If you have any questions or comments feel free to post them on this article or on the video itself. Thanks for taking the time to read this and watch the video, I hope this helps you out with your appliance repair!
Kenmore 90 Series Washer Repair
Today we are going to talk a little about a Kenmore 90 Series Top Load Washer. These have got to be one of the most common washers on the market today. Kenmore washers are mainly made by Whirlpool, so the information in this post will apply to them also.
Figuring out how to change a part will sometimes turn out to be easier than actually figuring out which part is bad in the first place. Sometimes people just take a wild guess. That's usually not the most cost effective way to do a repair. In that case you might as well just pay the repairman to come to your house and do it right the first time. That may turn out cheaper than replacing multiple parts and still not having a fixed machine. But anyway, enough about that for now. On to a couple simple diagnosing tips.
Let's do a what if and go from there. What if your washer is not spinning? Alright, so to be more accurate on our diagnosis we need to determine a couple things. Starting with, is the washer working in the wash cycle then not spinning in the spin cycle, or is the washer not working in the wash cycle either. This makes big difference in which parts are going to need to be looked at. If the washer's wash cycle is working fine and the spin cycle is the problem you could just be looking at a lid switch repair. That would probably be the most common problem with this type of washer. If neither cycles are working, you would want to focus your attention to the motor coupler. This piece connects the motor to the transmission, letting the machine wash and spin. The motor will spin in one direction to wash and it will spin in the opposite direction to spin. To help with diagnosing a motor coupler you are going to have to take a listen to the machine. If the motor coupler is faulty, the machine is going to sound like it's washing or spinning, but nothing is happening. Basically you are hearing the motor spin, but the tub is not rotating.
This video Below will show you how to remove the cabinet from your Kenmore or Whirlpool Top Load Washer. This is usually the most asked question when it comes to repairing these machines. Once you know what to replace and get the cabinet off, like I said earlier, replacing the part is the easy step.
Now I'm going to end this post here. This is so I have something else to write about later. Please feel free to post in the comments any questions you have with your Kenmore or Whirlpool Top Load Washer. I will do my best to help you out. Thanks for taking the time to read this post!
Broken Stove Top
Labels:
cleaning,
glass top,
stove,
stove repair
Todays post is going to be on glass top stoves. How to take care of them and how NOT to break them.
On two separate occasions today I had to "break" the bad news to some customers that their precious smooth top stove is going to cost an arm and a leg to repair. Two instances that could have been easily avoided. I won't complain too much though, unfortunately your pain is my financial gain, right? I am the Appliance Repair Man! I secretly tell my wife, I hope people break their sh*&, pay my bills! lol. OK, I'm done, for now.
Taking care of your smooth top stove is not going to be rocket science but you will have to spend more time cleaning it then you would your standard coil burner stove. The glass of a smooth top stove is some pretty sturdy glass, but it's not bulletproof. If the stove is new, please make sure that you use the Cerama-Bryte on the top before you use it. Think of it like waxing your car. It makes it so much easier to clean when you make your first mess.
This next tip is probably the most important advice to follow when owning a ceramic smooth top stove. Do not put your salt and pepper shaker on the top of the control panel. That includes your pretty little kitchen decorations that you may be tempted to fancy up your stove with. Don't do it, just don't.
Of course you want to make sure your pans are flat on the bottom. If not they will rock around and potentially cause a crack to magically appear on the glass top. If the bottom of your pans have burned up whatever on them, that will leave marks on the top. Maybe not permanent but hard to clean off marks.
Use caution when your putting your pots and pans on the stove. If you set them down too hard on the top you can break the glass. These are some things that you need to pay extra attention to when you own a ceramic smooth top stove.
Another thing you don't want to do is turn on a burner without a pan on it and leave it run. A few seconds you'll be fine. I'm talking about turning it on, then doing other kitchen duties while that burner is just blaring away at the glass with no pot on it. Your just asking for a $300 plus repair. And that's not being very green now is it? If I have left anything out that you feel should be in there, just let me know in the comments, I'll edit the post and include it.
Now on to cleaning the top. The good old green scratchy pad is the best for big messes. If you have something burned on there use that along with some dish soap and put some elbow grease on it. That will take off most everything. Now if you've finally decided after 10 years to finally clean the top, you may have to resort to more drastic measures. This is where some common sense will go along way. After you have scrubbed away with your green scratchy, for an hour and you still have rings around the burner, grab a razor blade scraper. You can use this on the top, it will be fine. Just keep the blade flat and make sure its new. Cover the top with some cerama-bryte, spread it around and go to town scraping off the really hard to get off burned on grease and grime. Be patient and don't use power tools, I've seen it all, trust me.
Thanks for taking the time to read my post! Please comment if you have any questions or if you just have anything to add.
On two separate occasions today I had to "break" the bad news to some customers that their precious smooth top stove is going to cost an arm and a leg to repair. Two instances that could have been easily avoided. I won't complain too much though, unfortunately your pain is my financial gain, right? I am the Appliance Repair Man! I secretly tell my wife, I hope people break their sh*&, pay my bills! lol. OK, I'm done, for now.
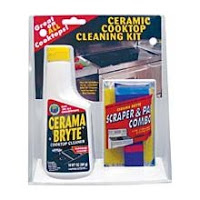 |
| Cerama Bryte |
This next tip is probably the most important advice to follow when owning a ceramic smooth top stove. Do not put your salt and pepper shaker on the top of the control panel. That includes your pretty little kitchen decorations that you may be tempted to fancy up your stove with. Don't do it, just don't.
Of course you want to make sure your pans are flat on the bottom. If not they will rock around and potentially cause a crack to magically appear on the glass top. If the bottom of your pans have burned up whatever on them, that will leave marks on the top. Maybe not permanent but hard to clean off marks.
Use caution when your putting your pots and pans on the stove. If you set them down too hard on the top you can break the glass. These are some things that you need to pay extra attention to when you own a ceramic smooth top stove.
Another thing you don't want to do is turn on a burner without a pan on it and leave it run. A few seconds you'll be fine. I'm talking about turning it on, then doing other kitchen duties while that burner is just blaring away at the glass with no pot on it. Your just asking for a $300 plus repair. And that's not being very green now is it? If I have left anything out that you feel should be in there, just let me know in the comments, I'll edit the post and include it.
Now on to cleaning the top. The good old green scratchy pad is the best for big messes. If you have something burned on there use that along with some dish soap and put some elbow grease on it. That will take off most everything. Now if you've finally decided after 10 years to finally clean the top, you may have to resort to more drastic measures. This is where some common sense will go along way. After you have scrubbed away with your green scratchy, for an hour and you still have rings around the burner, grab a razor blade scraper. You can use this on the top, it will be fine. Just keep the blade flat and make sure its new. Cover the top with some cerama-bryte, spread it around and go to town scraping off the really hard to get off burned on grease and grime. Be patient and don't use power tools, I've seen it all, trust me.
Thanks for taking the time to read my post! Please comment if you have any questions or if you just have anything to add.
Frigidaire Refrigerator not Cooling
Labels:
frigidaire,
no cool,
not cooling,
refrigerator
Todays blog post is going to be on a service call that I performed today. It was on a Frigidaire Side by Side refrigerator. The problem the customer was having was that most of the food in the freezer had thawed and nothing in the refrigerator side was cool.
They had been away for a couple days and they had family coming over and checking on the pets at the house. Their dad had notice that there was water on the floor in front of the fridge during one of the visits. So the father opened up the freezer door and notice all the ice had melted from the ice bin, but the food in the bottom of the freezer was still frozen. When he opened up the refrigerator door the temperature display was reading 65 degrees for both freezer and refrigerator side. The water dispenser was also not working.
OK, so now that we know what was going on with the machine we can move on to diagnostics. Because I have been repairing appliances for so long I already knew what was wrong with the machine, or at least what wasn't working. So what I'm going to do is try my best to explain the basic operation of the fridge and how I determined where to start digging into the machine.
On most side by side refrigerators the evaporator coils are located in the freezer behind the rear panel toward the bottom half of the back wall. The evaporator fan sits above that. That fan blows the cold air from the evaporator coils to the top of the freezer compartment behind the back wall. From there the air is divided. Most of the air blows into the top of the freezer and creates a circular pattern of air movement. Some of the air is pushed into the refrigerator compartment through what is called the damper. Its basically a little door that opens and closes controlling the air flow into the fridge side of your machine. That air starts at the top, moves down over the shelves and returns to the freezer through another damper at the bottom of the compartment. OK, moving on.
I'm going to spoil the suspense and tell you that the fan was not working on this refrigerator. I didn't say the fan was bad, I said not working. There is a difference. If the fan was bad, it would have been getting the proper voltage and not moving. If the fan is not getting the correct voltage to operate then something else is bad and the fan is not working. Anyway, moving on....the frost build up from the defrost issue was what was causing the fan to not be able to rotate.
What was happening with their fridge was the all the cold air being produce by the evaporator coils was not being moved around in that circular of air motion that I was talking about earlier. The coldest air will always settle at the bottom of the fridge and of course the warmer air is going to stay at the top. Now that we know this it makes sense that if the fan was not moving air to the top of the freezer, the ice will melt. It will run out of the bucket, through the shoot on the door and right onto the floor. Because the compressor is still running and producing cold air in the freezer, things at the very bottom of the freezer remained frozen.
Lets talk about why the temperature was reading almost room temperature. The thermistors that read the temperature are located on the back wall in both compartments about 3/4 of the way up. Now we know that warmer air is higher up, I shouldn't really have to explain any further. Do I? YES, thats why its frozen at the bottom and still reading a high temperature!
Why did the water stop working on the dispenser? Well, this one is easy enough now that we know the frozen air rests at the bottom. There is a water tank the rests behind crisper drawers of the refrigerator compartment. That is why the water is always nice and cool when it comes out of the dispenser, when its working of course. But that's in the refrigerator side? Yes, because air from the freezer is going into the fridge compartment through the lower damper (that's always open), so everything at the bottom of the fresh food side of the refrigerator is also frozen when the fan stops moving the air. That includes the water in the tank. So when its frozen, it doesn't flow.
Here is a post with a Frigidaire Refrigerator being used a test machine to help you troubleshoot a little better.
Refrigerator Not Getting Cold
Here is a Website for Troubleshooting Frigidaire Refrigerators - Step by Step
Do you have any questions? If so just leave them in the comment section below. I will do my best to follow up and pass on some knowledge.
Refrigerator is Too Warm
Labels:
frigidaire,
refrigerator repair,
warm refrigerator
When your Refrigerator is always a couple degrees too warm
This post is Specific to Frigidiare Side by Side Refrigerators. A problem that some notice is that the Temperature in the Refrigerator Compartment is too warm. This is a fix that took me a couple calls to tech support to figure out the first time I ran into this.
If you are having problems with the temperature always being a couple degrees too warm, or you notice that things are spoiling quicker than they should, read on.
I was on a warranty service call when I learned this. The Customer was having a problem with the temperature staying just over 40 Degrees. They already had two other service companies out to repair this and nobody could fix the problem. The thermostats, fan, defrost board, everything had been replaced already before I got there.
The problem was with warm air from the compressor area leaking inside the fridge compartment. It was coming in where the water lines for the water filter and cold water storage come through the liner and enter the fresh food side.
You can see where these lines come through if you remove the two lower drawers inside the refrigerator. One water line will run into a tank behind the drawers and the other water line runs up to the water filter. The hole these water lines come through needs to be completely sealed. If they are not sealed the warm air from the compressor area will enter the fridge. When this happens you will alway notice the temperature just a little to warm all the time. Not to mention that the refrigerator will run more than it should causing undue stress on the compressor.
How do you fix this. That is pretty easy, now that you know where to look for the problem. Get some food grade silicone and reseal around the lines. The key is to make sure that no air can enter the fridge where the lines come through. Pile it on thick and push it into the hole to make sure you have a good seal. Once this is done, you will notice the temperature will start to rest at below 40 degrees instead of just above.
Yes, the little bit of air that comes through that opening will make a huge difference in the air temperature inside. Those couple extra degrees of temperature is what is spoiling your food quicker than normal.
Frigidaire Refrigerator Repair Manuals
Maytag Neptune Washer
Labels:
maytag neptune,
maytag repair,
repair manual,
washer

Download the Repair Manual for your Maytag Neptune Washer
One thing that has always bothered me about Online Appliance Repair is inaccuracy. Here's what I'm talking about.
Let's say you have a Maytag Washer that's not spinning. That's simple to find on the internet right? Of course it is. Maybe you will read the post about the guy who replaced the spin board. That took care of his problem. Go ahead and order one and stick it on your machine. Did it start spinning again? Probably not, here's what happen. You and the guy you read about didn't have the same problem. Maybe it was just your lid switch. Did your belt break? Is the Motor Bad? Is the timer not sending out the correct signal to the control board? Who knows, any one of those parts will cause your Maytag Neptune to not go into the spin cycle.
Of course doing your research on the computer is helpful in finding all the different repairs that were done on your type of machine, but you need to know what you need to do to fix YOUR machine. That's when the factory service manual comes in handy. The Repair Manual for your Appliance is the best knowledge about your machine that you could possibly have. One simple reason why, that's what the Appliance Technicians use when they have trouble. Come on now.
Maytag Neptune Washers can be run in diagnostics mode to point you in the right direction so you know which parts to check first. Just remember that when one thing isn't working on your washer, there are a number of parts that work together to make the whole process happen. The Manual will have more pictures than you know what to do with. Every part of the Washer is covered in the Maytag Neptune Repair Manual. There is alot that can go wrong with these washers so it would be a waste of time and money to guess at which part you need to replace to repair it. Fix it right the first time, correctly.
Another good thing about the Repair Manual is, once you download it to your computer, it's easy to find. That way the next time you have a problem with your washer, you have ALL the information you will need in one place and you don't have to wait for someone to reply back to your post. Having the manual around is alot cheaper than having a service guy out to your house to do what you are more than likely capable of doing yourself.
Once Payment is made you will get an email with the link to download and save the manual to your computer.
Frigidaire Refrigerator Repair Manuals
Labels:
Frigidaire Repair,
Manuals,
Refrigerators
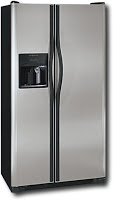
Downloads for DIY Repair on Frigidaire Refrigerators
For those who want to Repair your Frigidaire Refrigerators themselves. Below is a list of links for Different Repair and Service Manuals for almost Every Frigidaire Refrigerator.
These Service Manuals Cover every aspect of the machines. Each Manual is in PDF form so it is easily viewed on your computer. Once you Purchase the Manual you will Receive an Email with the Link to Download and Save it. The cost for the Manual is Relatively Cheap compared to having a Service Technician come to your home and tell you the same thing that's in the Manuals. You will find that most repairs are rather simple fixes with the correct guidance.
Another bonus that comes with the Frigidaire Repair Manuals is that when you make a purchase you get unlimited phone support from a Frigidaire Authorized Servicer. ME. All you need to do is email your order number to me when you download your Service Manual. Once I get the email with your order number from your manual download I will respond back with a toll free 800 number that you can reach me at. My email address is .
Here are the links for the Frigidaire Refrigerater Repair Manuals:
- Frigidaire Side by Side with Electronic Controls
- Frigidaire Side by Side without Electronic Controls
- Frigidaire Top Freezer Refrigerators
- Frigidaire Top Freezers with Beverage Dispensor
If you are not sure which manual you need, just send me an email with your model number in the subject line. I will respond back with the link for which repair manual that pertains to your machine.
Refrigerator in the Garage
Labels:
garage refrigerator,
refrigerator repair
Garage Refrigerator
Why won't your Refrigerator Work Properly in the Garage?
This is a common question. I will do my best to explain why your Freezer won't freeze properly when it's kept in the garage. More than likely you only notice this problem when the temperatures outside get down to freezing or close to it.
Basically there really isn't anything wrong with the Refrigerator itself. The problem is the outside air temperature. The Refrigerator Section in most Top Freezer Refrigerators is where the only thermostat for the machine is located. The Freezer Temperature is determined by how long the fridge runs, more on that later. The Refrigerator running in 70 - 75 degree temperatures(kitchen) will be "calling for cold" 45 -55 percent of the time. That means the machine is running about half the time. This keeps the temperature in the fridge compartment just below 40 degrees or so. By running about half the time causes the temperature in the freezer to toggle around zero.
Now, how do you adjust the freezer temperature then if the only thermostat is in the refrigerator compartment? ah, Good Question. That is pretty simple. The evaporator is located in the freezer section. This is what "gets cold" when the compressor runs. The fridge section gets its cold air from the freezer. There is an air diverter that only allows a small amount of air to circulate from the freezer to the refrigerator when it's calling for cold. So, at the factory settings in an average room temperature setting, the freezer will have to run long enough to freeze when it needs to cool the fridge compartment. Make sense? If you want to make the freezer temperature lower, you are essentially going to starve the refrigerator side's air flow. This will keep the freezer running longer to cool the fridge section and therefor you have lower freezer temperature.
Now here is the reason your Freezer won't Freeze in the garage during the winter months. If the outside temperature is close to the temperature your refrigerator section needs to be, the compressor will only have to run for a very short time to make the fridge happy. That will not be enough time for the freezer to pull down to the proper temperature.
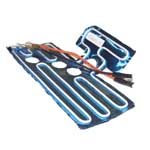
There are kits you can get to solve this issue. There are normally called Garage Kits. Pretty easy to remember right. How a garage kit works is by tricking the refrigerator to think it's in a warmer environment. A garage kit is placed by the thermostat in the Refrigerator Compartment and it puts off a small amount of heat causing the freezer to cycle on and off more frequently. This allows the freezer to get down to the proper temperature and keep the things in your freezer completely frozen all the time. Not most of the time or sometimes.
It is a rather simple solution that the average person can do themselves. The kit shown in this post is a garage kit for a Frigidaire Refrigerator. This will give you an idea of what one looks like. If you have any questions about this, just visit Appliance Outlet and you can get more help there.
Why won't your Refrigerator Work Properly in the Garage?
This is a common question. I will do my best to explain why your Freezer won't freeze properly when it's kept in the garage. More than likely you only notice this problem when the temperatures outside get down to freezing or close to it.
Basically there really isn't anything wrong with the Refrigerator itself. The problem is the outside air temperature. The Refrigerator Section in most Top Freezer Refrigerators is where the only thermostat for the machine is located. The Freezer Temperature is determined by how long the fridge runs, more on that later. The Refrigerator running in 70 - 75 degree temperatures(kitchen) will be "calling for cold" 45 -55 percent of the time. That means the machine is running about half the time. This keeps the temperature in the fridge compartment just below 40 degrees or so. By running about half the time causes the temperature in the freezer to toggle around zero.
Now, how do you adjust the freezer temperature then if the only thermostat is in the refrigerator compartment? ah, Good Question. That is pretty simple. The evaporator is located in the freezer section. This is what "gets cold" when the compressor runs. The fridge section gets its cold air from the freezer. There is an air diverter that only allows a small amount of air to circulate from the freezer to the refrigerator when it's calling for cold. So, at the factory settings in an average room temperature setting, the freezer will have to run long enough to freeze when it needs to cool the fridge compartment. Make sense? If you want to make the freezer temperature lower, you are essentially going to starve the refrigerator side's air flow. This will keep the freezer running longer to cool the fridge section and therefor you have lower freezer temperature.
Now here is the reason your Freezer won't Freeze in the garage during the winter months. If the outside temperature is close to the temperature your refrigerator section needs to be, the compressor will only have to run for a very short time to make the fridge happy. That will not be enough time for the freezer to pull down to the proper temperature.

There are kits you can get to solve this issue. There are normally called Garage Kits. Pretty easy to remember right. How a garage kit works is by tricking the refrigerator to think it's in a warmer environment. A garage kit is placed by the thermostat in the Refrigerator Compartment and it puts off a small amount of heat causing the freezer to cycle on and off more frequently. This allows the freezer to get down to the proper temperature and keep the things in your freezer completely frozen all the time. Not most of the time or sometimes.
It is a rather simple solution that the average person can do themselves. The kit shown in this post is a garage kit for a Frigidaire Refrigerator. This will give you an idea of what one looks like. If you have any questions about this, just visit Appliance Outlet and you can get more help there.
Frigidaire Dishwasher Door Squeaks
Labels:
dishwasher,
frigidaire,
repair,
squeak
Download Frigidaire
Repair Manuals
Every time the Dishwasher Door opens or closes it drives you crazy! What causes the annoying door music?
This vibration type noise I'm refering to applies to Frigidaire Dishwashers with the following model numbers.
FDB4315LF
FDBB4365F
LEDB500FE
GLD4355RF
PLD4375RF
PLD4555RF
The noise is caused by tension on the nylon cable from the spring, as it moves around the friction pulley. Basically a vibrating cable making the spring get quite noisy. The next question of course is how do you fix the problem?
How to Fix and Repair the Noisy Dishwasher Door Springs and Cables:
First, check the cables for any grease or oil, if the cables have been lubricated replace the cable
and friction pulley it rides around. This may require replacing the cable and pulley on both
sides. After checking or replacing these parts take a bar of regular unscented soap and
liberally rub both of the cable and the door spring on both sides. Then open and close the
door 4 or 5 times to work the soap into the cable and pulley to complete repair.
Here are the Parts and the Part Numbers for what you may need to stop the Squeak.
Door Cable is Part Number 154578801
Door Spring is Part Number 154579101
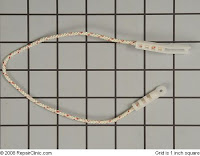

Microwave not Heating - Magnetron
Labels:
magnetron,
Microwave,
Microwave Repair
 Download Frigidaire Microwave Repair Manuals
I encounter this complaint all the time. "Everything seems to be working fine, except it's not heating." The clock counts down the time, the lights are on, the fans work.
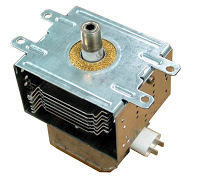
The main component that heats the food in your microwave is the Magnetron. That is what it looks like on the right of the window. When this stops working, you know. NO HEAT. No Popcorn. That sucks.
What you have to determine from this point is if the machine is worth repairing or not. Most microwave manufactures carry a five year extended warranty on this part. Check your reciepts. If you don't have a reciept, they normally go off of the date the machine was made at the factory. So have your Model and Serial Number when you call to check. You can also check this if you have your owner's manual. In the very back of your owner's manual they list everything that is covered and how long it's covered.
Moving on, let's say it's not covered. Basically, if your Microwave sits on the counter, replace it. The Magnetron will more than likely cost more than you paid for the Microwave in the first place. They range in price from around $90 to $160. Unless your emotionally attached to it and it has sentimental value just get rid of it, it's really not worth repair. If your Microwave is an over-the-range model you have to consider a couple things before you decide. You really need to think about this and make your own determination. If you have taken great care of it and it's a higher end model, it may be worth repair. If its falling apart and just plain ugly and you don't really like it anyway, throw it out.
So, it's higher end and you want to repair it. Should you do it yourself or call in an Expert? That is greatly going to depend on you. If you feel you are comfortable and have great patience and attention to detail you won't have a problem. The job is going to require you to remove the Microwave from the wall. Once the unit is off the wall, you will have to remove the outer shell and some of the panels on the inside to access the Magnetron. The total time to replace this component will take better than an hour. How much longer than an hour just depends on your skill level. If it takes me longer than an hour to replace a magnetron, it wasn't my fault.(lol)
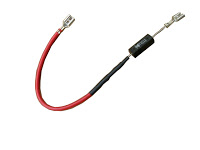
The magnetron is directly behind the control panel area. It is a pain to squeeze out and you may have to ever so slightly bend a panel. That's normal. One important thing to remember. Before you buy a new Magnetron, replace the diode first. As seen to the left here. There is a slim chance that this peice has failed and that's why the magnetron isn't working. Replace it first and see. You need to replace the diode anyway when you replace the magnetron, so it's really not going to cost extra. They are only a couple dollars anyway. And wouldn't it be great if you could repair your Microwave for a couple bucks. But, if you replace the diode and you still have no heat, then go ahead and order and replace the Magnetron.
Some things to watch out for. There is a high voltage capacitor that the diode connects to. Don't
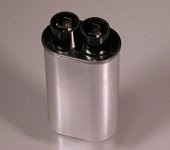
put your screwdriver or fingers across the two terminals on it. It's alot stronger than a 9-volt battery. The capactor is pictured on the right here. You should be careful during the whole repair. Make sure you pay attention to what was plugged in and where. Wear gloves. Have plenty of room to work. Best done on the floor, at least for me anyway.
Below is a video on how to repair your microwave if it is completely not working. Thanks for watching.
Below is a video on how to repair your microwave if it is completely not working. Thanks for watching.
My Refrigerator is clicking
Labels:
Compressor,
refrigerator,
refrigerator repair
In this article I'm going to talk about the Clicking Noise that may occur with your refrigerator. I answer Appliance Questions online and this is a very common complaint. So I will write it here to save me from retyping it over and over.
The components on the side of the compressor are called your relay, starter and capacitor
 . There are a few different styles but they pretty much do the same thing. They allow the electrical current to enter the compressor
 .
. 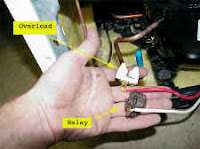 IF the compressor is going bad, say shorted windings in the motor, this will cause the compressor to draw to many amps of electricity. When the compressor draws too much current, the overload will overheat and "CLICK". When you hear that click, that is the sound of, your refrigerator isn't going to get cold anymore and you better fix it quick noise. That's why you're here.
The clicking noise is very distinct and it will sound like it's coming from under the refrigerator or from the back. You may also hear buzzing. The overload will click when it cools down and lets current through the circuit again. So, click off, click on. But if the component parts are bad or the compressor is bad this cycle will happen again, and again, again, and so on and so forth. Usually about the rate of every minute or so.
Now, there are a few other things that will cause this to overheat and shut off. One is if your condenser coils are covered in pet hair and haven't been cleaned in some time. Lint, dust, hair, who knows what else can be there but you get the point. If those coils are not kept clean, the compressor will run hot. That will cause the overload on the side of the compressor to overheat and "click"-no cool. Unplug the fridge and clean the coils. This may fix the problem if the overload or compressor weren't damaged. You will know right away. If the fridge runs fine after cleaning the coils then you are okay. You will know usually within a few minutes if the something has been damaged. It will still click.
Another thing that can cause the click is an adaptive defrost control board. It contains a relay that sends power to the parts on the side of the compressor. When the defrost board doesn't send full power to the compressor, this causes an increased amp draw to make up for the voltage drop. Increased amp draw equals "CLICK"
One more thing that may cause this clicking sound is the condenser fan not working. The condenser fan is the fan that is next to the compressor. It has a couple jobs. Evaporate the defrost water and keeping the heat off the condenser coils and compressor. If the fan isn't running when the compressor is running, guess what will happen. "CLICK" I think you know why by now, but just in case, the compressor overheats and the overload on the side of the compressor, protects it by shutting off the power. Hopefully if your fan motor was bad, the overload did its job and saved your compressor. You can place a separate fan on the floor blowing on the compressor and coils to temporarily get you by until your new parts arrive.
Okay, you cleaned the coils, got a fan if you needed one and it still clicks, now what? The first thing to do is replace the components on the side of the compressor. Hopefully the compressor starts up and the new components don't click like the old ones. If they don't click you are good to go. Good job, you just saved a bunch of money on appliance repairs.
But what if it still clicks? Well, to put it nicely, your refrigerator may need to find a new home(scrapyard). That means your compressor has internal damage or you have some sort of freon restriction. If your refrigerator is less than five years old it may be covered by the manufacture's limited warranty. That means this repair will not cost you. But, if it's older than that or you don't have some sort of extended warranty plan, this repair will cost you at least $300. And if you are really unlucky it could cost around $600. The difference in price being whether you only need freon work, or you need the compressor replaced.
I think I've covered the basics. You now know what the annoying clicking sound is when your refrigerator gives up and stops getting cold. The clicking is capable of happening periodically. Make sure the refrigerator isn't running in temperatures above 85 - 90 degrees F. Don't let the refrigerator be exposed to direct sunlight. Keep the coils clean. Don't leave the doors hanging open for long periods of time. If you are having a defrost issue this sound could be heard. That is because with a defrost issue, the compressor runs constantly and that will cause it to overheat.
If you are having a Defrost Issue be sure to read about Defrost Problems on my blog. Search for Frost in my Freezer.
Thanks for taking the time to read this. If you have more questions about this I can be found on YouTube.com/ApplianceOutlet. Post your Comments or Questions either on this Blog or at the bottom of my YouTube videos.
The components on the side of the compressor are called your relay, starter and capacitor
 IF the compressor is going bad, say shorted windings in the motor, this will cause the compressor to draw to many amps of electricity. When the compressor draws too much current, the overload will overheat and "CLICK". When you hear that click, that is the sound of, your refrigerator isn't going to get cold anymore and you better fix it quick noise. That's why you're here.
The clicking noise is very distinct and it will sound like it's coming from under the refrigerator or from the back. You may also hear buzzing. The overload
Now, there are a few other things that will cause this to overheat and shut off. One is if your condenser coils are covered in pet hair and haven't been cleaned in some time. Lint, dust, hair, who knows what else can be there but you get the point. If those coils are not kept clean, the compressor will run hot. That will cause the overload on the side of the compressor to overheat and "click"-no cool. Unplug the fridge and clean the coils. This may fix the problem if the overload or compressor weren't damaged. You will know right away. If the fridge runs fine after cleaning the coils then you are okay. You will know usually within a few minutes if the something has been damaged. It will still click.
Another thing that can cause the click is an adaptive defrost control board. It contains a relay that sends power to the parts on the side of the compressor. When the defrost board doesn't send full power to the compressor, this causes an increased amp draw to make up for the voltage drop. Increased amp draw equals "CLICK"
One more thing that may cause this clicking sound is the condenser fan not working. The condenser fan is the fan that is next to the compressor. It has a couple jobs. Evaporate the defrost water and keeping the heat off the condenser coils and compressor. If the fan isn't running when the compressor is running, guess what will happen. "CLICK" I think you know why by now, but just in case, the compressor overheats and the overload on the side of the compressor, protects it by shutting off the power. Hopefully if your fan motor was bad, the overload did its job and saved your compressor. You can place a separate fan on the floor blowing on the compressor and coils to temporarily get you by until your new parts arrive.
Okay, you cleaned the coils, got a fan if you needed one and it still clicks, now what? The first thing to do is replace the components on the side of the compressor. Hopefully the compressor starts up and the new components don't click like the old ones. If they don't click you are good to go. Good job, you just saved a bunch of money on appliance repairs.
But what if it still clicks? Well, to put it nicely, your refrigerator may need to find a new home(scrapyard). That means your compressor has internal damage or you have some sort of freon restriction. If your refrigerator is less than five years old it may be covered by the manufacture's limited warranty. That means this repair will not cost you. But, if it's older than that or you don't have some sort of extended warranty plan, this repair will cost you at least $300. And if you are really unlucky it could cost around $600. The difference in price being whether you only need freon work, or you need the compressor replaced.
I think I've covered the basics. You now know what the annoying clicking sound is when your refrigerator gives up and stops getting cold. The clicking is capable of happening periodically. Make sure the refrigerator isn't running in temperatures above 85 - 90 degrees F. Don't let the refrigerator be exposed to direct sunlight. Keep the coils clean. Don't leave the doors hanging open for long periods of time. If you are having a defrost issue this sound could be heard. That is because with a defrost issue, the compressor runs constantly and that will cause it to overheat.
If you are having a Defrost Issue be sure to read about Defrost Problems on my blog. Search for Frost in my Freezer.
Thanks for taking the time to read this. If you have more questions about this I can be found on YouTube.com/ApplianceOutlet. Post your Comments or Questions either on this Blog or at the bottom of my YouTube videos.
Subscribe to:
Posts (Atom)

