Kenmore 90 Series Washer Repair

Today we are going to talk a little about a Kenmore 90 Series Top Load Washer.  These have got to be one of the most common washers on the market today.  Kenmore washers are mainly made by Whirlpool, so the information in this post will apply to them also.
Figuring out how to change a part will sometimes turn out to be easier than actually figuring out which part is bad in the first place.  Sometimes people just take a wild guess.  That's usually not the most cost effective way to do a repair.  In that case you might as well just pay the repairman to come to your house and do it right the first time.  That may turn out cheaper than replacing multiple parts and still not having a fixed machine.  But anyway, enough about that for now.  On to a couple simple diagnosing tips.
Let's do a what if and go from there.  What if your washer is not spinning?  Alright, so to be more accurate on our diagnosis we need to determine a couple things.  Starting with, is the washer working in the wash cycle then not spinning in the spin cycle, or is the washer not working in the wash cycle either.  This makes  big difference in which parts are going to need to be looked at.  If the washer's wash cycle is working fine and the spin cycle is the problem you could just be looking at a lid switch repair.  That would probably be the most common problem with this type of washer.  If neither cycles are working, you would want to focus your attention to the motor coupler.  This piece connects the motor to the transmission, letting the machine wash and spin.  The motor will spin in one direction to wash and it will spin in the opposite direction to spin.  To help with diagnosing a motor coupler you are going to have to take a listen to the machine.  If the motor coupler is faulty, the machine is going to sound like it's washing or spinning, but nothing is happening.  Basically you are hearing the motor spin, but the tub is not rotating.

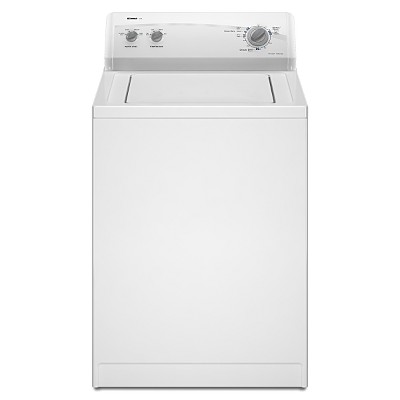
This video Below will show you how to remove the cabinet from your Kenmore or Whirlpool Top Load Washer.  This is usually the most asked question when it comes to repairing these machines.  Once you know what to replace and get the cabinet off, like I said earlier, replacing the part is the easy step.


Now I'm going to end this post here.  This is so I have something else to write about later.  Please feel free to post in the comments any questions you have with your Kenmore or Whirlpool Top Load Washer.  I will do my best to help you out.  Thanks for taking the time to read this post!

Broken Stove Top

Todays post is going to be on glass top stoves.  How to take care of them and how NOT to break them.

On two separate occasions  today I had to "break" the bad news to some customers that their precious  smooth top stove is going to cost an arm and a leg to repair.  Two instances that could have been easily avoided.  I won't complain too much though, unfortunately your pain is my financial gain, right?  I am the Appliance Repair Man!  I secretly tell my wife, I hope  people break their sh*&, pay my bills! lol.  OK, I'm done, for now.

Cerama Bryte
Taking care of your smooth top stove is not going to be rocket science but you will have to spend more time cleaning it then you would your standard coil burner stove.  The glass of a smooth top stove is some pretty sturdy glass, but it's not bulletproof.  If the stove is new, please make sure that you use the Cerama-Bryte on the top before you use it.  Think of it like waxing your car.  It makes it so much easier to clean when you make your first mess.

This next tip is probably the most important advice to follow when owning a ceramic smooth top stove.  Do not put your salt and pepper shaker on the top of the control panel.   That includes your pretty little kitchen decorations that you may be tempted to fancy up your stove with.  Don't do it, just don't.

Of course you want to make sure your pans are flat on the bottom.  If not they will rock around and potentially cause a crack to magically appear on the glass top.  If the bottom of your pans have burned up whatever on them, that will leave marks on the top.  Maybe not permanent but hard to clean off marks.

Use caution when your putting your pots and pans on the stove.  If you set them down too hard on the top you can break the glass.  These are some things that you need to pay extra attention to when you own a ceramic smooth top stove.

Another thing you don't want to do is turn on a burner without a pan on it and leave it run.  A few seconds you'll be fine.  I'm talking about turning it on, then doing other kitchen duties while that burner is just blaring away at the glass with no pot on it.  Your just asking for a $300 plus repair.  And that's not being very green now is it?  If I have left anything out that you feel should be in there, just let me know in the comments, I'll edit the post and include it.

Now on to cleaning the top.  The good old green scratchy pad is the best for big messes.  If you have something burned on there use that along with some dish soap and put some elbow grease on it.  That will take off most everything.  Now if you've finally decided after 10 years to finally clean the top, you may have to resort to more drastic measures.  This is where some common sense will go along way.  After you have scrubbed away with your green scratchy, for an hour and you still have rings around the burner, grab a razor blade scraper.  You can use this on the top, it will be fine.  Just keep the blade flat and make sure its new.  Cover the top with some cerama-bryte, spread it around and go to town scraping off the really hard to get off  burned on grease and grime.  Be patient and don't use power tools, I've seen it all, trust me.

Thanks for taking the time to read my post!  Please comment if you have any questions or if you just have anything to add.

Frigidaire Refrigerator not Cooling

Todays blog post is going to be on a service call that I performed today.  It was on a Frigidaire Side by Side refrigerator.  The problem the customer was having was that most of the food in the freezer had thawed and nothing in the refrigerator side was cool.

They had been away for a couple days and they had family coming over and checking on the pets at the house.  Their dad had notice that there was water on the floor in front of the fridge during one of the visits.  So the father opened up the freezer door and notice all the ice had melted from the ice bin, but the food in the bottom of the freezer was still frozen.  When he opened up the refrigerator door the temperature display was reading 65 degrees for both freezer and refrigerator side.  The water dispenser was also not working.

OK, so now that we know what was going on with the machine we can move on to diagnostics.  Because I have been repairing appliances for so long I already knew what was wrong with the machine, or at least what wasn't working.  So what I'm going to do is try my best to explain the basic operation of the fridge and how I determined where to start digging into the machine.

On most side by side refrigerators the evaporator coils are located in the freezer behind the rear panel toward the bottom half of the back wall.  The evaporator fan sits above that.  That fan blows the cold air from the evaporator coils to the top of the freezer compartment behind the back wall.  From there the air is divided.  Most of the air blows into the top of the freezer and creates a circular pattern of air movement.  Some of the air is pushed into the refrigerator compartment through what is called the damper.  Its basically a little door that opens and closes controlling the air flow into the fridge side of your machine.  That air starts at the top, moves down over the shelves and returns to the freezer through another damper at the bottom of the compartment.  OK, moving on.

I'm going to spoil the suspense and tell you that the fan was not working on this refrigerator.  I didn't say the fan was bad, I said not working.  There is a difference.  If the fan was bad, it would have been getting the proper voltage and not moving.  If the fan is not getting the correct voltage to operate then something else is bad and the fan is not working.  Anyway, moving on....the frost build up from the defrost issue was what was causing the fan to not be able to rotate.

What was happening with their fridge was the all the cold air being produce by the evaporator coils was not being moved around in that circular of air motion that I was talking about earlier.  The coldest air will always settle at the bottom of the fridge and of course the warmer air is going to stay at the top.  Now that we know this it makes sense that if the fan was not moving air to the top of the freezer, the ice will melt.  It will run out of the bucket, through the shoot on the door and right onto the floor.  Because the compressor is still running and producing cold air in the freezer, things at the very bottom of the freezer remained frozen.

Lets talk about why the temperature was reading almost room temperature.  The thermistors that read the temperature are located on the back wall in both compartments about 3/4 of the way up.  Now we know that warmer air is higher up, I shouldn't really have to explain any further.  Do I?  YES, thats why its frozen at the bottom and still reading a high temperature!

Why did the water stop working on the dispenser?  Well, this one is easy enough now that we know the frozen air rests at the bottom.  There is a water tank the rests behind crisper drawers of the refrigerator compartment.  That is why the water is always nice and cool when it comes out of the dispenser, when its working of course.  But that's in the refrigerator side?  Yes, because air from the freezer is going into the fridge compartment through the lower damper (that's always open), so everything at the bottom of the fresh food side of the refrigerator is also frozen when the fan stops moving the air.  That includes the water in the tank.  So when its frozen, it doesn't flow.

Here is a post with a Frigidaire Refrigerator being used a test machine to help you troubleshoot a little better.

Refrigerator Not Getting Cold

Here is a Website for Troubleshooting Frigidaire Refrigerators - Step by Step


Do you have any questions?  If so just leave them in the comment section below.  I will do my best to follow up and pass on some knowledge.