Source for troubleshooting and repair help with your appliances. Articles on Refrigerator, Washer, Dryer, Stove and Microwave service. Everything you need to do your own repairs on all brands of major appliances.
All this help is free along with lots of useful videos to assist you.
Help with repair, fix and replace.
Today we are going to talk a little about Troubleshooting a Refrigerator that is not getting cold and a few things to check to get you going in the right direction in repairing the problem.
There are a couple things that need to happen for your refrigerator to get cold. The compressor has to run, the evaporator fan has to move the air around the refrigerator to cool down the entire inside of your fridge and freezer. There are a couple components on your refrigerator that are going to control when the compressor and the fan run. One being the defrost timer, the other being the thermostat or also called the cold control. I have made a couple videos explaining how to test each one of these parts and what they look like to help guide you along in your repair. I am still going to try to explain a basic walk through of what I would do if I was at your house.
The first thing I would check to make sure the Refrigerator was getting the proper voltage. If you open up the refrigerator and the light is on, we can move on. If you don't have a light inside the refrigerator, test the outlet that the fridge is plugged into and make sure that there is voltage at the plug in the neighborhood of 120VAC. Now that we have gone over that lets move on.
On a no cool refrigerator after I have determined that power is not an issue, the next thing I would do is open up the freezer door. There are a couple things that we are going to look for. First thing you are going to want to listen for is the fan inside the freezer. If the fan is running, good, if not, we have to figure out why the fan is not running. The two parts we talked about earlier are in control of the freezer fan.
If your fan is not running, check the compressor. It is the black round motor in the back of the refrigerator that pumps the freon through the sealed system. Is the compressor running? If the compressor is running and the fan is not running we need to check the evaporator fan first. If the compressor is not running we need to check the defrost timer and the thermostat first.
First thing I'm going to go over is checking the evaporator fan. Most fans inside your freezer are 120 VAC fans. When the compressor is running the fan will also be receiving voltage at the same time. You are going to need to access the evaporator fan for this test. At this point you are going to want to unplug the refrigerator from the wall and remove the back panel of your freezer. You are going to need to access the evaporator fan motor. The first test is going to be seeing if the fan is good or bad. With the refrigerator unplugged from the wall, remove the wires that are plugged into the fan and test the resistance across the two terminals on the fan motor. You should not read and open circuit. Normally you should read something like 100 to 125 ohms or so. If you test the fan and have an open circuit, the fan is bad and will need replaced. For the next test with the fan we are going to see if the fan motor is getting the correct voltage when the compressor is running. From here you are going to place your meter on VAC so we can test the current going to to fan. So plug the fridge back in and test the wires going to the fan motor. Make sure you can hear the compressor running when you do this test. If you hear the compressor running and the fan is not getting 120 volts, the defrost timer is bad. If your refrigerator does not have a defrost timer but has an ADC board, then its bad. The ADC board and the Defrost timer do basically the same thing. One is mechanical the other works off a control board.
Moving on, now we are going to run some tests for a refrigerator that the compressor and the evaporator fan are not running. You are going to want to first locate the defrost timer on your machine. The first check is going to be to see if it's stuck in defrost. The fridge will go into defrost about 3 times a day. So for around 30 minutes the compressor and the fan are shut down and the heater is turned on in the freezer to clear the frost and ice off the coils behind the rear panel. The refrigerator does this to make sure that the cold freezer air can easily circulate throughout the whole unit, keeping everything cold. Now for the test, grab yourself a flat head screwdriver and find the dial on the defrost timer. You want to turn the dial clockwise. You will hear some clicking as the timer moves. There are two distinct clicks, first one being the timer entering defrost mode and the second distinct click coming out of the defrost cycle. If the compressor and fan come on when you turn the dial, great, now you know that you have a bad defrost timer. Now if that didn't make the fan and compressor come on then we have to test the thermostat. The thermostat will also shut down the fridge when it reaches the correct temperature. However if its defective, then it will shut down the goodies when it's not supposed to. How to test the thermostat is pretty simple. Unplug the fridge from the wall, remove the two wires that plug into the thermostat. With the thermostat set to the factory setting, the midway point or so, test the resistance across the two terminals. If the thermostat is bad, it will read an open circuit. If the thermostat is reading a closed circuit, then the timer is bad and not letting any voltage reach either the fan or the compressor.
Thanks for taking the time to read this post and watch some videos. I hope that the information in here has helped you locate the problem with your refrigerator and you are able to fix it. If you have any questions or need some more help, I try to answer all my comments on my posts, either with a new post or in the comments themselves, so leave a comment with any questions you have or let me know if this helped you out. Make sure you thumbs up the videos and add them to your favorites, that helps me out alot.
Good Luck with your repair, I hope I was able to save you some money by you not having to call out a professional.
So the problem is you loaded up your washer, turned the dial to start, then you flooded your laundry room. That is never a good day. Lets talk a little about what happened and how to troubleshoot this problem to find out what malfunctioned on your washer to let this happen.
There are a couple things that control the water coming into your washer. The first thing is going to be the water inlet valve. Basically how this works is you set the washer to fill with either hot, warm or cold water. When you turn the timer on, the temperature selector switch is going to tell which valve to open and let the water in. The timer only says it needs water, the temperature selector switch controls which valve lets it in. Basically the water valve is going to get 120 VAC, the solenoid will open and water will flow.
Normally when a water valve goes bad it will not let water in at all when it receives the voltage from the temp switch. However, it is possible that the valve has stuck open and is not able to close when the voltage is removed. You will know if the valve is stuck open because the only way you will get the water to stop going into the washer is to shut the water supply off to the washer. So to make this clear, you will be able to unplug the washer from the wall and water will continue to flow into the machine if the water supply is turned on. Got it?
Now, if you push the timer knob in and the water stops flowing into the washer you have a different problem than what we just went over. This check is going to bring your attention to the pressure switch and the pressure switch hose. The pressure switch is going to be whats attached to the load size knob. How this works is, as the washer fills with water, air gets trapped inside the pressure switch hose. As the water level rises the pressure inside the hose becomes greater. So if you set the washer to a small load, it only takes a little pressure inside the hose to tell the pressure switch to cut the water off and tell the timer to agitate. If you set the load size for a large load, it will take a lot more pressure for the pressure switch to cut the water and tell the timer to move on. The pressure switch hose is attached to the bottom of the wash tub and runs up and connects to the pressure switch.
Let's say you overloaded your washer and it was banging around and you didn't catch it right away. You hear the machine going nuts, run down fix the load so its balanced and bounce. The washer still has to go through a rinse cycle or two. Because your machine was off balance and shoot violently, it could have ripped off the pressure switch hose that's attached to the bottom of the tub. Now air cannot be trapped inside the tube and your pressure switch is not going to have any idea how much water is in there.
Sometimes the a hole can develop in the hose from rubbing on the frame somewhere over years of use. If that happens that will leave out the pressure and you'll overflow your washer. If you have a problem with the switch or hose, the water will shut off to the washer simply by pressing in on the timer knob.
Please make sure you watch the video on this page. This is me explaining what I've gone over here in this article. Plus you get to see how to troubleshoot each part on your washer so you'll be able to tell if the hose is bad, or if the valve is bad and how to diagnose each part the controls the flow of water in your washer.
The last thing you want to have is a washer that overflows, but if you did and that's what brought you hear, I hope I was able to help you solve your problem and point you in the right direction getting you washer back up and running like it should be.
Be sure to give the video a "Thumbs UP" hit the "LIKE" button. Leave some comments either on this post or on the videos main page. I will do my best to answer your questions. Thanks for taking the time to read this and good luck with your Appliance Repair!
Today's post is going to be about Kenmore and Whirlpool Washers. These washers are probably one of the most popular and well built machines on the market today. So much so that if you were to buy a Maytag washer at the time of this post, it's actually a Whirlpool built washer. They haven't changed the way they are made in almost 15 years. That should tell you something right there. So let's move on.
When your Direct Drive washer is not spinning, there are a couple things that you are going to want to check. First thing being the Lid Switch. Basically when you have a problem with the lid switch, the washer will fill up, then stop. It will not Wash, Agitate or Spin.
The next check is going to be the Motor Coupler. This is the plastic gear like piece that connects the motor to the transmission. When this part breaks, your washer will sound like its trying to spin, but won't actually be spinning. Most of the time a quick peek up under the machine will help you determine whether that is bad or not.
So lets say the switch and the coupler are fine. This is the main reason for this post here. I haven't really found any good videos on how to check the clutch on a Kenmore or Whirlpool Washer. So, I decided to make one. This troubleshooting tip is specifically for a washer that sounds like its spinning, but it's not. Changing the clutch on your washer is not going to be that hard of a job. All you need to do is pay close attention to the video and you will be just fine.
I always tell people when I'm out doing service, this is one machine that if it does break, get it fixed. Do not get rid of it. The parts for these washer are readily available and relatively easy for the average homeowner to repair. All you guys need is some help with troubleshooting so your replacing the right parts.
Make sure you follow my Blog here and also Subscribe to my YouTube Channel, ApplianceOutlet. Leave some comments on the video, and make sure to add it to your favorites. Thanks for taking the time to read this and check out the video. I check my comments almost daily, so feel free to ask for some help or request a video for me to do. I have access to tons of appliances, so it's likely I can show you what you need to see to tell you what you need to know to help out. Again, Thanks!
Dryer Tips and Troubleshooting - Cleaning your Dryer
Today I want to help you troubleshoot your dryer that is taking too long to dry your clothes.
When a dryer is taking too long to dry, people usually think that their dryer is about to go, or the heating element is wore out. Most of the time this indicates an airflow issue. Airflow issues with dryers can also cause the safety thermostat to trip or the thermal fuse to blow. Usually when one of these two parts go out, it's caused by one of the three things that i'm going over today.
The first thing I want to cover is your lint filter. It is very important that you clean your dryer's lint filter before each load of clothes you dry. You would be surprised how many people don't do this. The lint filter is where the hot damp air needs to pass through before it leaves your dryer. If the lint filter is blocked up, air can't pass through it and your clothes aren't going to dry very well.
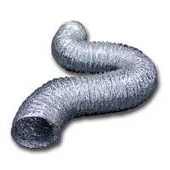
The second thing I want to cover is your dryer vent hoses. I would recommend having them cleaned at least once a year. Over time the inside of the hose will build up with lint. This lint build up will cause the air inside the venting to slow down causing poor dry times. If the dryer venting is longer than 10 feet, you might want to clean them out every six months or so. Depending on how and where your venting is run, that's going to determine how you need to clean them out. One thing you need check regularly, maybe every month or so is where the venting leaves the house. You want to make sure the flap on the outside of your house is able to completely open up when the dryer is turned on. Plus, make sure an animal didn't build a nest in there.
The last thing I want to cover is the dryer itself. This is just as important as the first two that i've covered. If you want to keep your dryer running effieciently you have to clean the inside of your dryer too. I'm not talking about where you put the clothes, but inside where you can't see. The dryer isn't exactly air tight, so if you have some sort of venting issue, lint will accumulate inside the dryer and cause other problems, including dryer fires. Over time the lint will accumulate inside the bottom of your dryer and basically cover all the components with a thick layer of lint. This can cause the motor to overheat and eventually stop working. Lint can also build up on the pulleys and rollers causing them to not spin freely and you could be replacing dryer belts more frequently then you need too.
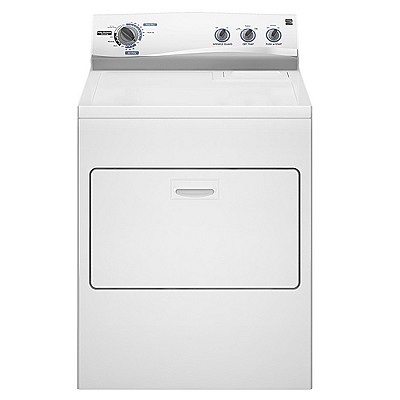
Lately my wife has been telling me that our dryer is taking forever to dry our clothes. So I'm going to take this opportunity to show you guys how to clean the inside of your dryer. I have an Electric Kenmore dryer, so this will apply to most all Kenmore, Whirlpool and Roper Dryers. This Video below is basically me reading this page and showing you what you need to do and check. Remember to use common sense when attempting to do your own repairs.
If you have any questions or comments feel free to post them on this article or on the video itself. Thanks for taking the time to read this and watch the video, I hope this helps you out with your appliance repair!