Showing posts with label how to. Show all posts

How to Clean a Smooth Top Stove - #1 Best Way

Today we are going to talk about cleaning your glass top stove.  Too many times I will run a service call on someones appliance, other than the stove, and notice how dirty or stained up their glass top range is.  Every single day I end up giving someone a cleaning lesson on how to keep their cooktop looking brand new for years to come.  Of all the stoves that I've cleaned for people, one thing I have found out is,  nobody does it like I do.  Not sure why.  It is actually a very simple process.

You want to think of the smooth top on your stove like the paint on your car.  You must clean and protect it from dirt, grease and grime.  Regular cleaning is an absolute must when you own one of these.  There is no way around it.  But, if you want it to look like garbage, then stop reading now.  If you are interested in keeping your cooktop looking like its brand new, read on my friend.

There are a couple of supplies that you are going to need to begin.  Number one being being cooktop cleaner. Whether it's generic or Cerama Bryte or whatever, you will need this.  Do not use anything else other than cooktop cleaner.  Stop using Windex, bleach water, soapy water or whatever home concoction you have been using.  By using these products you are making cleaning your glass top much harder than what it really needs to be.  Seriously.

The next most important cleaning supply you are going to need is a green scotch brite pad.  These are very cheap and readily available pretty much anywhere.  There is no reason to not have a box or two of these around.  These are very effective for cleaning off burnt grease and and water stain marks.  Don't even think about using your washcloth. It does not have the scrubbing power.  The glass top on your stove will be just fine.  You will not hurt it at all.

Number three is going to be a razor blade scraper.  You will need this if you have not kept up with your cooktop cleaning duties.  I can tell you right now that you will not be able to properly clean your stove without one of these.  So make sure you have one when you are ready to begin.  You would be surprised of how many people don't realize or are afraid to use a razor blade on their stove.  Now you know that it is OK, let's move on to the last thing you will need.

The last supply that you are going to want to have are some paper towels.  You will need precisely two full sheets.  Do not use the paper towels that feel like cloth.  They may work for other cleaning purposes, but not for this.  Just trust me on this, they suck for this job.  Cheap paper towels work the best.  This is based off me cleaning hundreds of stove tops for people as a courtesy.

Now that you know what you need, let me tell you how to accomplish this mission.  Make sure that you are not cleaning your stove when the top is still hot from cooking.  Let it cool before you begin.

Step one is going to be applying the cooktop cleaner.  You want to use a generous amount to make sure that you can rub on a thick coat of this stuff.  Step two is going to be to use your green scotch brite pad to rub and scrub as much grease and grim off the cooktop as you can.  While the cleaner is spread around this is where you want to razor blade the areas that will not scrub off.  Once you have gotten off all the grease and grim that you can, its time to buff it clean.  Use a paper towel or clean rag to wipe off most of the excess cleaner.  You want to leave a thin coat still on the top.  This thin coat will haze over.  After it hazes over, go ahead and use a clean part of your rag or a new paper towel to finish buffing the top to a shine.

This method will work every time.  This should be the only way that you clean the top of your stove.  I am without a doubt sure that if you clean it like this regularly, your top will look brand new the entire time you own your glasstop stove.

Make sure you watch the video on this page.  This is me giving a demonstration on what this article is about. Give the video a thumbs up on YouTube.  Leave some comments if you have any questions or just want to say something.  I do my best to respond to every comment left on my YouTube channel.  Thanks for taking the time to read and watch this.  Good Luck with your new cooktop or your dirty cooktop that is going to look its best in years.
To read more on Caring for you Stove follow this link.
Washer Overflowing / Overfilling How to Fix

So the problem is you loaded up your washer, turned the dial to start, then you flooded your laundry room.  That is never a good day.  Lets talk a little about what happened and how to troubleshoot this problem to find out what malfunctioned on your washer to let this happen.

There are a couple things that control the water coming into your washer.  The first thing is going to be the water inlet valve.  Basically how this works is you set the washer to fill with either hot, warm or cold water.  When you turn the timer on, the temperature selector switch is going to tell which valve to open and let the water in.  The timer only says it needs water, the temperature selector switch controls which valve lets it in.  Basically the water valve is going to get 120 VAC, the solenoid will open and water will flow.


Normally when a water valve goes bad it will not let water in at all when it receives the voltage from the temp switch.  However, it is possible that the valve has stuck open and is not able to close when the voltage is removed.  You will know if the valve is stuck open because the only way you will get the water to stop going into the washer is to shut the water supply off to the washer.  So to make this clear, you will be able to unplug the washer from the wall and water will continue to flow into the machine if the water supply is turned on.  Got it?


Now, if you push the timer knob in and the water stops flowing into the washer you have a different problem than what we just went over.  This check is going to bring your attention to the pressure switch and the pressure switch hose.  The pressure switch is going to be whats attached to the load size knob.  How this works is, as the washer fills with water, air gets trapped inside the pressure switch hose.  As the water level rises the pressure inside the hose becomes greater.  So if you set the washer to a small load, it only takes a little pressure inside the hose to tell the pressure switch to cut the water off and tell the timer to agitate.  If you set the load size for a large load, it will take a lot more pressure for the pressure switch to cut the water and tell the timer to move on.  The pressure switch hose is attached to the bottom of the wash tub and runs up and connects to the pressure switch.  


Let's say you overloaded your washer and it was banging around and you didn't catch it right away.  You hear the machine going nuts, run down fix the load so its balanced and bounce.  The washer still has to go through a rinse cycle or two.  Because your machine was off balance and shoot violently, it could have ripped off the pressure switch hose that's attached to the bottom of the tub.  Now air cannot be trapped inside the tube and your pressure switch is not going to have any idea how much water is in there.


Sometimes the a hole can develop in the hose from rubbing on the frame somewhere over years of use.  If that happens that will leave out the pressure and you'll overflow your washer.  If you have a problem with the switch or hose, the water will shut off to the washer simply by pressing in on the timer knob.


Please make sure you watch the video on this page.  This is me explaining what I've gone over here in this article.  Plus you get to see how to troubleshoot each part on your washer so you'll be able to tell if the hose is bad, or if the valve is bad and how to diagnose each part the controls the flow of water in your washer.


The last thing you want to have is a washer that overflows, but if you did and that's what brought you hear, I hope I was able to help you solve your problem and point you in the right direction getting you washer back up and running like it should be.


Be sure to give the video a "Thumbs UP"  hit the "LIKE" button.  Leave some comments either on this post or on the videos main page.  I will do my best to answer your questions.  Thanks for taking the time to read this and good luck with your Appliance Repair!

Kenmore 90 Series Washer Repair

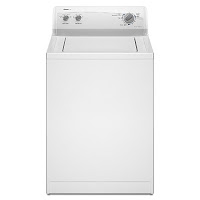
Today we are going to talk a little about a Kenmore 90 Series Top Load Washer.  These have got to be one of the most common washers on the market today.  Kenmore washers are mainly made by Whirlpool, so the information in this post will apply to them also.
Figuring out how to change a part will sometimes turn out to be easier than actually figuring out which part is bad in the first place.  Sometimes people just take a wild guess.  That's usually not the most cost effective way to do a repair.  In that case you might as well just pay the repairman to come to your house and do it right the first time.  That may turn out cheaper than replacing multiple parts and still not having a fixed machine.  But anyway, enough about that for now.  On to a couple simple diagnosing tips.
Let's do a what if and go from there.  What if your washer is not spinning?  Alright, so to be more accurate on our diagnosis we need to determine a couple things.  Starting with, is the washer working in the wash cycle then not spinning in the spin cycle, or is the washer not working in the wash cycle either.  This makes  big difference in which parts are going to need to be looked at.  If the washer's wash cycle is working fine and the spin cycle is the problem you could just be looking at a lid switch repair.  That would probably be the most common problem with this type of washer.  If neither cycles are working, you would want to focus your attention to the motor coupler.  This piece connects the motor to the transmission, letting the machine wash and spin.  The motor will spin in one direction to wash and it will spin in the opposite direction to spin.  To help with diagnosing a motor coupler you are going to have to take a listen to the machine.  If the motor coupler is faulty, the machine is going to sound like it's washing or spinning, but nothing is happening.  Basically you are hearing the motor spin, but the tub is not rotating.

This video Below will show you how to remove the cabinet from your Kenmore or Whirlpool Top Load Washer.  This is usually the most asked question when it comes to repairing these machines.  Once you know what to replace and get the cabinet off, like I said earlier, replacing the part is the easy step.


Now I'm going to end this post here.  This is so I have something else to write about later.  Please feel free to post in the comments any questions you have with your Kenmore or Whirlpool Top Load Washer.  I will do my best to help you out.  Thanks for taking the time to read this post!