Showing posts with label washer. Show all posts

Front Load Washer - Not Draining

How to Clean and Test the Drain Pump

Front Load Washer
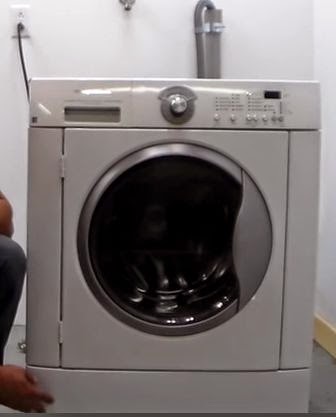
Frigidaire Front Load Washer
This means your laundry is not getting done, this also means you are very upset and are looking on the internet to learn how to fix the problem.  Here you go, you found the right place.

My name is Bill, today we are going to learn how to clean and test the drain pump on your front load washer.  There are a few things we need to cover before you work on your front loader.
1. Safety of course
2. Common Sense
3. Pay close attention to detail
4. Patience
Lower Panel
If you follow those guidelines you shouldn't have any issue in completing this repair.  The machine we are going to work on today for this demonstration is a Frigidaire Front Load Washer.  All models are going to be very similar and you will be able to apply what you learn with this machine to other models, even other brands, including Whirlpool, Samsung, Maytag and GE and whoever else makes front load washers.
Removing Top of Washer
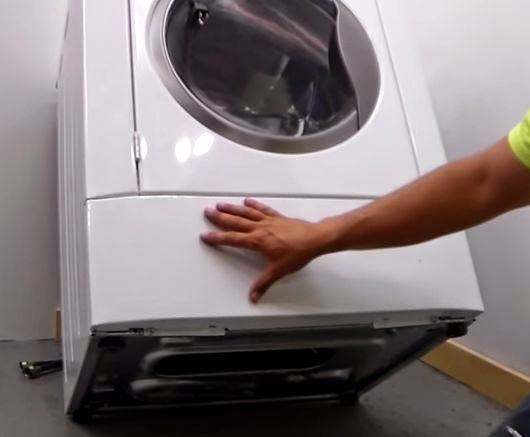
Some front loaders have a lower panel that is removable so you don't have to take the whole front of the washer off to access the drain pump.  If your machine has a lower panel that is separate from the main front panel you are lucky.  You have a lot less steps to get to the drain pump.  To remove this lower panel, take out the two screws that are under the front edge and the panel will come off.
Dispenser Removal
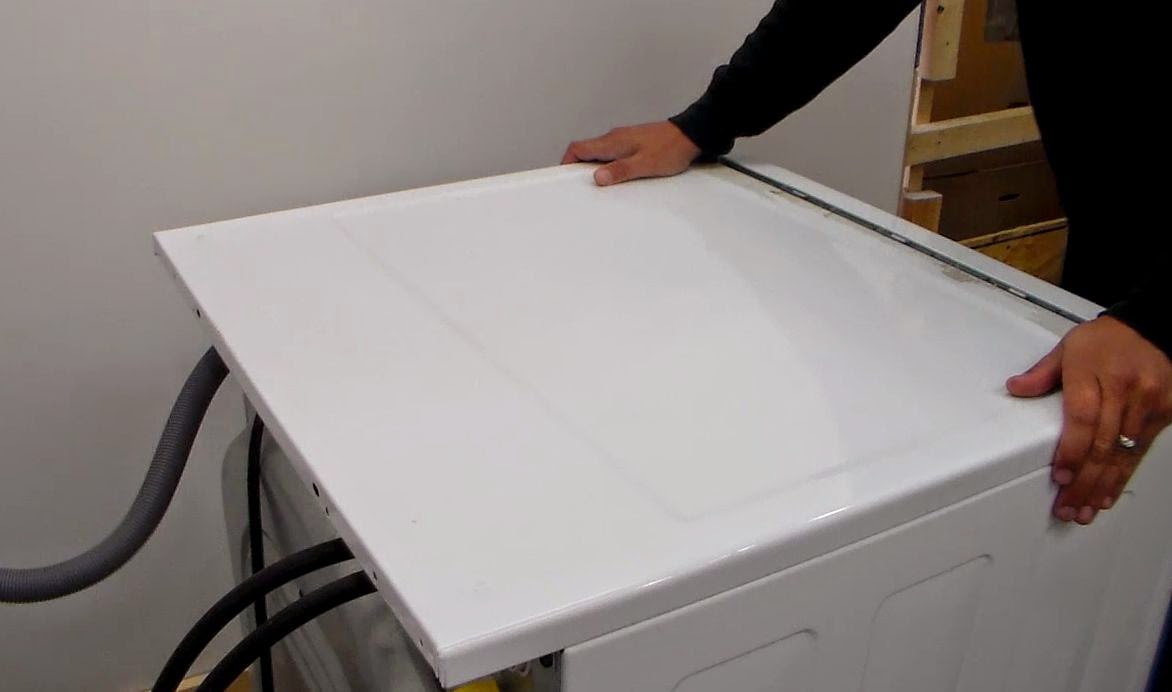
Now if your washer does not have the separated front, we are going to have to go through a few more steps to get to your drain pump.  Starting off with the easiest step, we are going to remove the top panel of the washer.  There are two screws on the back edge that hold it in place, take those out.  Now you can push the top back then lift it off and set is aside, you're not going to need that for a while.
Screws Behind Dispenser
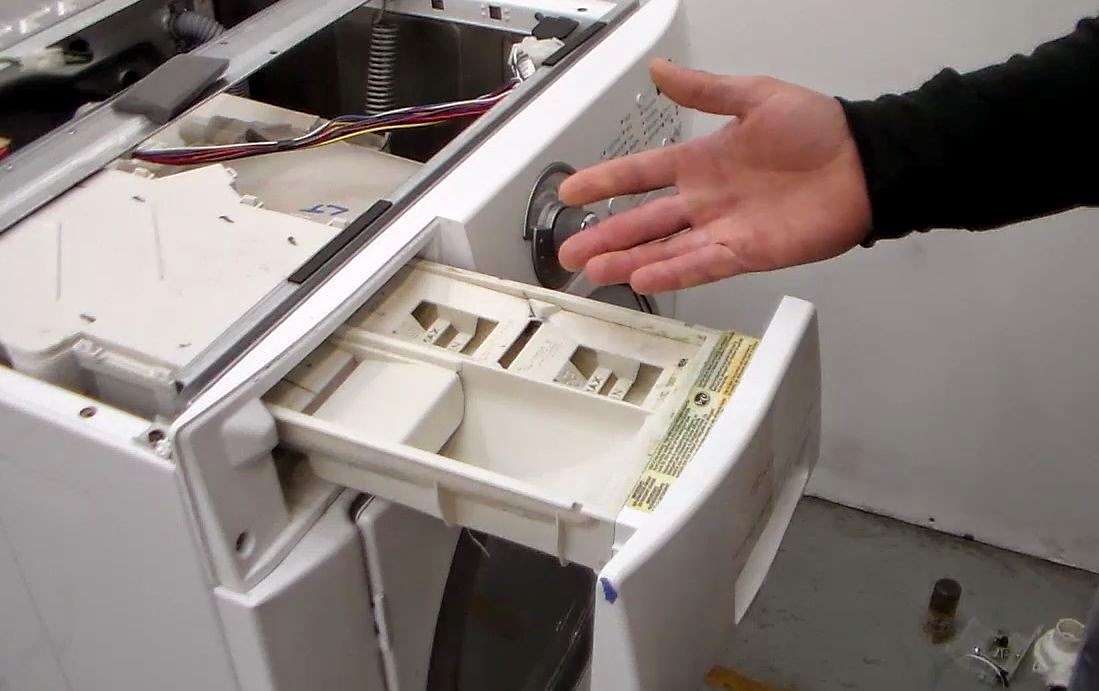
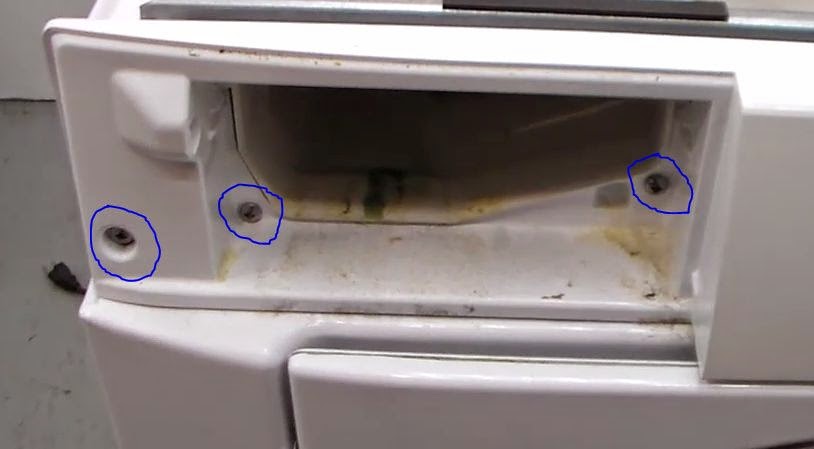
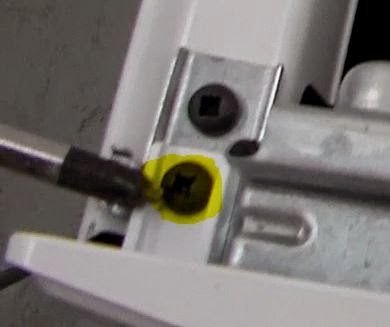
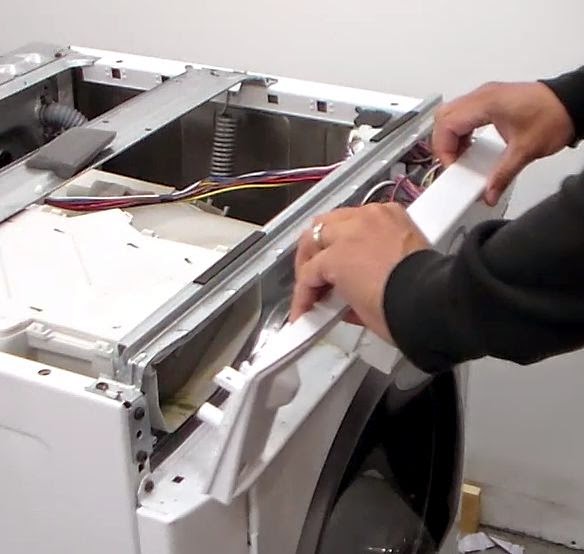
The control panel will need to come off next.  There are a series of screws that hold that thing in place.  It's a total of 5 screws all together.  First take out the soap dispenser completely and set that off to the side.  Start with the two screws up on top, then take the three out that were behind the soap dispenser.  Now just grab the top edge of the control and pull it away from washer.  It should come right off.  Now lay that on top of the washer, you shouldn't need to remove any of the wires from it.
Control Panel Screw
Next thing we are going to do is take out the screws that hold the door lock assembly onto the front of the machine.  Don't worry about taking the door lock out, it can stay where it's at.  Don't worry about disconnecting the wires to it either.
Pulling off the Control Panel
Now we will have to unhook the door gasket that's connected to the front of the washer.  This is so when we take away the front, the door bellow is not hooked to it.  There is a metal wire with a spring on it that fits around a groove on the gasket, simply grab a flat head screwdriver and pry it up, grab it and pull it off.
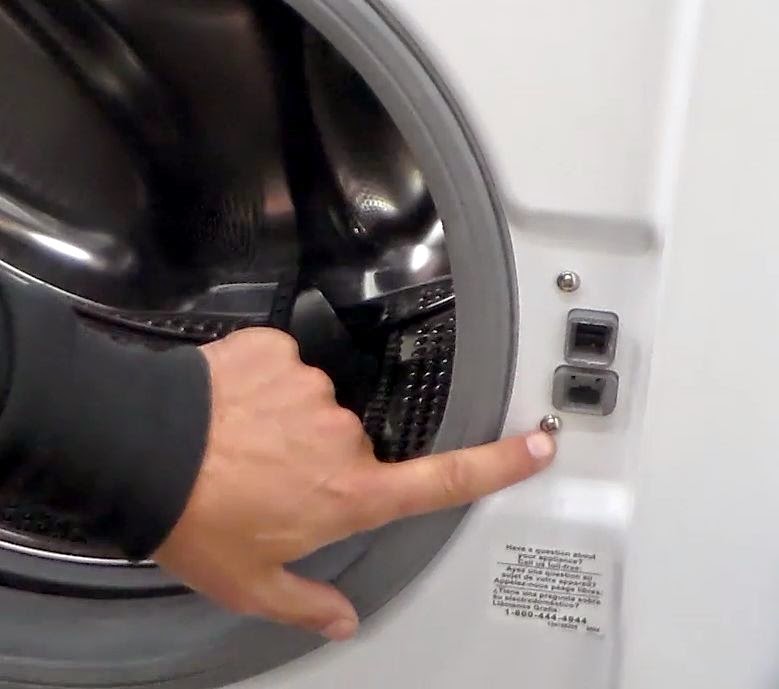
Door Lock Assembly
Now you are ready to take out the last few screws that hold the front of the washer on.  There are going to be 5 in total.  Three across the top and two at the bottom.  Once they are out you can take off the front of the washer and begin accessing the drain pump on your washer.

Two things need to be done when you have a washer that is not draining. The first thing that needs to be done is cleaning the coin trap in the drain hose that leads to the drain pump.  Most of the time this gets full of debris and prevents the washer from draining properly.  This stops all sorts of items from actually getting into the pump and causing damage.  
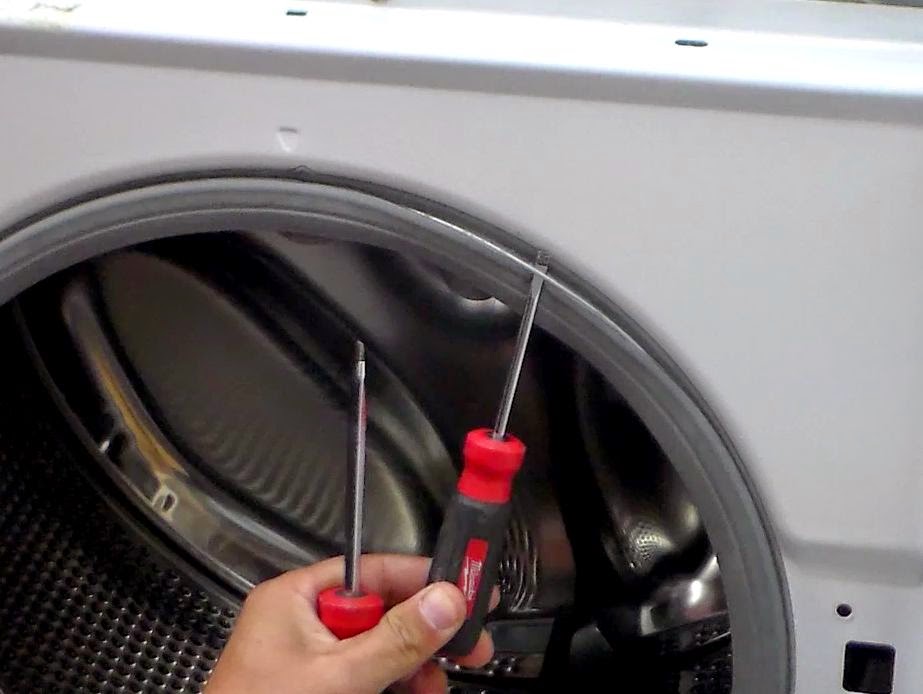
Door Gasket Removal
The second thing that needs to be done is test the drain pump.  Use a multimeter to get an ohm's reading on the motor and do a voltage test on the wires that go to the pump to make sure it's getting the proper voltage.

Once you have cleaned and tested your pump, you can put your washer back together and begin washing clothes.

Here are a couple YouTube Videos demonstrating How to Clean and How to Test your Drain Pump on a Front Load Washer.  If you have read this article it is time for you watch the videos.  The videos are on exactly what I have just talked about and they show you how to fix your washer in much better detail.


Washer Overflowing / Overfilling How to Fix

So the problem is you loaded up your washer, turned the dial to start, then you flooded your laundry room.  That is never a good day.  Lets talk a little about what happened and how to troubleshoot this problem to find out what malfunctioned on your washer to let this happen.

There are a couple things that control the water coming into your washer.  The first thing is going to be the water inlet valve.  Basically how this works is you set the washer to fill with either hot, warm or cold water.  When you turn the timer on, the temperature selector switch is going to tell which valve to open and let the water in.  The timer only says it needs water, the temperature selector switch controls which valve lets it in.  Basically the water valve is going to get 120 VAC, the solenoid will open and water will flow.


Normally when a water valve goes bad it will not let water in at all when it receives the voltage from the temp switch.  However, it is possible that the valve has stuck open and is not able to close when the voltage is removed.  You will know if the valve is stuck open because the only way you will get the water to stop going into the washer is to shut the water supply off to the washer.  So to make this clear, you will be able to unplug the washer from the wall and water will continue to flow into the machine if the water supply is turned on.  Got it?


Now, if you push the timer knob in and the water stops flowing into the washer you have a different problem than what we just went over.  This check is going to bring your attention to the pressure switch and the pressure switch hose.  The pressure switch is going to be whats attached to the load size knob.  How this works is, as the washer fills with water, air gets trapped inside the pressure switch hose.  As the water level rises the pressure inside the hose becomes greater.  So if you set the washer to a small load, it only takes a little pressure inside the hose to tell the pressure switch to cut the water off and tell the timer to agitate.  If you set the load size for a large load, it will take a lot more pressure for the pressure switch to cut the water and tell the timer to move on.  The pressure switch hose is attached to the bottom of the wash tub and runs up and connects to the pressure switch.  


Let's say you overloaded your washer and it was banging around and you didn't catch it right away.  You hear the machine going nuts, run down fix the load so its balanced and bounce.  The washer still has to go through a rinse cycle or two.  Because your machine was off balance and shoot violently, it could have ripped off the pressure switch hose that's attached to the bottom of the tub.  Now air cannot be trapped inside the tube and your pressure switch is not going to have any idea how much water is in there.


Sometimes the a hole can develop in the hose from rubbing on the frame somewhere over years of use.  If that happens that will leave out the pressure and you'll overflow your washer.  If you have a problem with the switch or hose, the water will shut off to the washer simply by pressing in on the timer knob.


Please make sure you watch the video on this page.  This is me explaining what I've gone over here in this article.  Plus you get to see how to troubleshoot each part on your washer so you'll be able to tell if the hose is bad, or if the valve is bad and how to diagnose each part the controls the flow of water in your washer.


The last thing you want to have is a washer that overflows, but if you did and that's what brought you hear, I hope I was able to help you solve your problem and point you in the right direction getting you washer back up and running like it should be.


Be sure to give the video a "Thumbs UP"  hit the "LIKE" button.  Leave some comments either on this post or on the videos main page.  I will do my best to answer your questions.  Thanks for taking the time to read this and good luck with your Appliance Repair!

Kenmore / Whirlpool Washer Not Spinning

Kenmore / Whirlpool Washer Not Spinning


Today's post is going to be about Kenmore and Whirlpool Washers.  These washers are probably one of the most popular and well built machines on the market today.  So much so that if you were to buy a Maytag washer at the time of this post, it's actually a Whirlpool built washer.  They haven't changed the way they are made in almost 15 years.  That should tell you something right there.  So let's move on.

When your Direct Drive washer is not spinning, there are a couple things that you are going to want to check.  First thing being the Lid Switch.  Basically when you have a problem with the lid switch, the washer will fill up, then stop.  It will not Wash, Agitate or Spin.

The next check is going to be the Motor Coupler.  This is the plastic gear like piece that connects the motor to the transmission.  When this part breaks, your washer will sound like its trying to spin, but won't actually be spinning.  Most of the time a quick peek up under the machine will help you determine whether that is bad or not.

So lets say the switch and the coupler are fine.  This is the main reason for this post here.  I haven't really found any good videos on how to check the clutch on a Kenmore or Whirlpool Washer.  So, I decided to make one.  This troubleshooting tip is specifically for a washer that sounds like its spinning, but it's not.  Changing the clutch on your washer is not going to be that hard of a job.  All you need to do is pay close attention to the video and you will be just fine.  

I always tell people when I'm out doing service, this is one machine that if it does break, get it fixed.  Do not get rid of it.  The parts for these washer are readily available and relatively easy for the average homeowner to repair.  All you guys need is some help with troubleshooting so your replacing the right parts.

Make sure you follow my Blog here and also Subscribe to my YouTube Channel, ApplianceOutlet.  Leave some comments on the video, and make sure to add it to your favorites.  Thanks for taking the time to read this and check out the video.  I check my comments almost daily, so feel free to ask for some help or request  a video for me to do.  I have access to tons of appliances, so it's likely I can show you what you need to see to tell you what you need to know to help out.  Again, Thanks!


Kenmore 90 Series Washer Repair

Today we are going to talk a little about a Kenmore 90 Series Top Load Washer.  These have got to be one of the most common washers on the market today.  Kenmore washers are mainly made by Whirlpool, so the information in this post will apply to them also.
Figuring out how to change a part will sometimes turn out to be easier than actually figuring out which part is bad in the first place.  Sometimes people just take a wild guess.  That's usually not the most cost effective way to do a repair.  In that case you might as well just pay the repairman to come to your house and do it right the first time.  That may turn out cheaper than replacing multiple parts and still not having a fixed machine.  But anyway, enough about that for now.  On to a couple simple diagnosing tips.
Let's do a what if and go from there.  What if your washer is not spinning?  Alright, so to be more accurate on our diagnosis we need to determine a couple things.  Starting with, is the washer working in the wash cycle then not spinning in the spin cycle, or is the washer not working in the wash cycle either.  This makes  big difference in which parts are going to need to be looked at.  If the washer's wash cycle is working fine and the spin cycle is the problem you could just be looking at a lid switch repair.  That would probably be the most common problem with this type of washer.  If neither cycles are working, you would want to focus your attention to the motor coupler.  This piece connects the motor to the transmission, letting the machine wash and spin.  The motor will spin in one direction to wash and it will spin in the opposite direction to spin.  To help with diagnosing a motor coupler you are going to have to take a listen to the machine.  If the motor coupler is faulty, the machine is going to sound like it's washing or spinning, but nothing is happening.  Basically you are hearing the motor spin, but the tub is not rotating.

This video Below will show you how to remove the cabinet from your Kenmore or Whirlpool Top Load Washer.  This is usually the most asked question when it comes to repairing these machines.  Once you know what to replace and get the cabinet off, like I said earlier, replacing the part is the easy step.


Now I'm going to end this post here.  This is so I have something else to write about later.  Please feel free to post in the comments any questions you have with your Kenmore or Whirlpool Top Load Washer.  I will do my best to help you out.  Thanks for taking the time to read this post!

Maytag Neptune Washer


Download the Repair Manual for your Maytag Neptune Washer

One thing that has always bothered me about Online Appliance Repair is inaccuracy. Here's what I'm talking about.

Let's say you have a Maytag Washer that's not spinning. That's simple to find on the internet right? Of course it is. Maybe you will read the post about the guy who replaced the spin board. That took care of his problem. Go ahead and order one and stick it on your machine. Did it start spinning again? Probably not, here's what happen. You and the guy you read about didn't have the same problem. Maybe it was just your lid switch. Did your belt break? Is the Motor Bad? Is the timer not sending out the correct signal to the control board? Who knows, any one of those parts will cause your Maytag Neptune to not go into the spin cycle.

Of course doing your research on the computer is helpful in finding all the different repairs that were done on your type of machine, but you need to know what you need to do to fix YOUR machine. That's when the factory service manual comes in handy. The Repair Manual for your Appliance is the best knowledge about your machine that you could possibly have. One simple reason why, that's what the Appliance Technicians use when they have trouble. Come on now.

Maytag Neptune Washers can be run in diagnostics mode to point you in the right direction so you know which parts to check first. Just remember that when one thing isn't working on your washer, there are a number of parts that work together to make the whole process happen. The Manual will have more pictures than you know what to do with. Every part of the Washer is covered in the Maytag Neptune Repair Manual. There is alot that can go wrong with these washers so it would be a waste of time and money to guess at which part you need to replace to repair it. Fix it right the first time, correctly.

Another good thing about the Repair Manual is, once you download it to your computer, it's easy to find. That way the next time you have a problem with your washer, you have ALL the information you will need in one place and you don't have to wait for someone to reply back to your post. Having the manual around is alot cheaper than having a service guy out to your house to do what you are more than likely capable of doing yourself.

Buy Now
$15.00

Once Payment is made you will get an email with the link to download and save the manual to your computer.