Showing posts with label Maytag. Show all posts

Front Load Washer - Not Draining

How to Clean and Test the Drain Pump
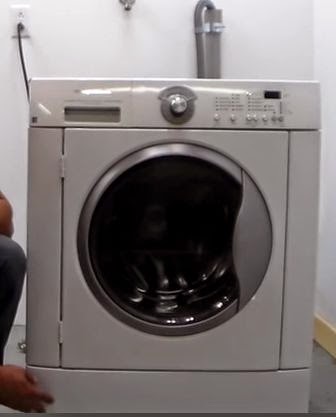

Front Load Washer
Frigidaire Front Load Washer
This means your laundry is not getting done, this also means you are very upset and are looking on the internet to learn how to fix the problem.  Here you go, you found the right place.

My name is Bill, today we are going to learn how to clean and test the drain pump on your front load washer.  There are a few things we need to cover before you work on your front loader.
1. Safety of course
2. Common Sense
3. Pay close attention to detail
4. Patience
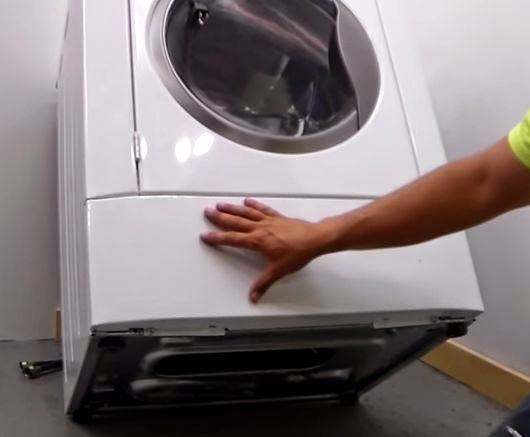
Lower Panel
If you follow those guidelines you shouldn't have any issue in completing this repair.  The machine we are going to work on today for this demonstration is a Frigidaire Front Load Washer.  All models are going to be very similar and you will be able to apply what you learn with this machine to other models, even other brands, including Whirlpool, Samsung, Maytag and GE and whoever else makes front load washers.
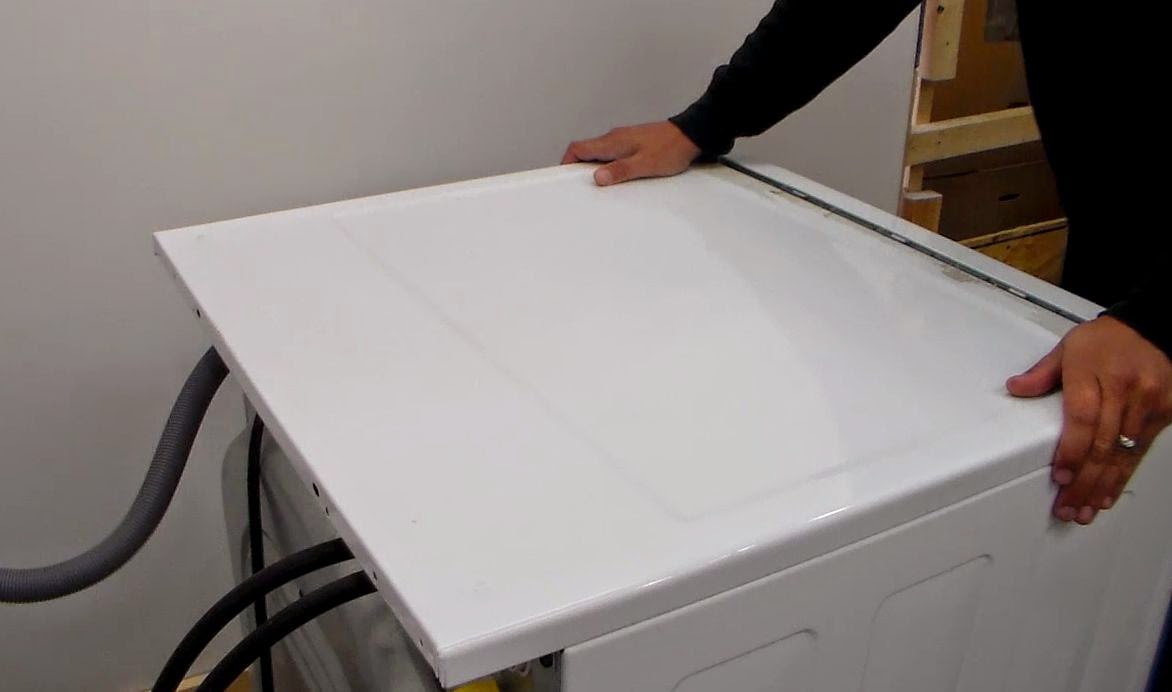
Removing Top of Washer
Some front loaders have a lower panel that is removable so you don't have to take the whole front of the washer off to access the drain pump.  If your machine has a lower panel that is separate from the main front panel you are lucky.  You have a lot less steps to get to the drain pump.  To remove this lower panel, take out the two screws that are under the front edge and the panel will come off.
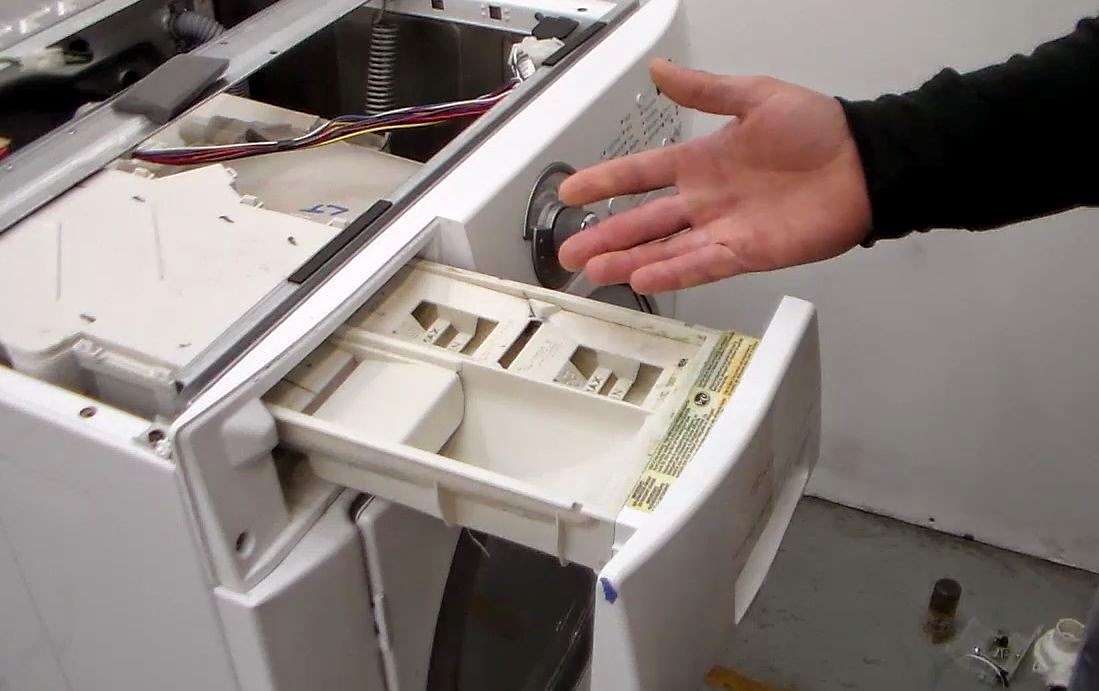
Dispenser Removal
Now if your washer does not have the separated front, we are going to have to go through a few more steps to get to your drain pump.  Starting off with the easiest step, we are going to remove the top panel of the washer.  There are two screws on the back edge that hold it in place, take those out.  Now you can push the top back then lift it off and set is aside, you're not going to need that for a while.
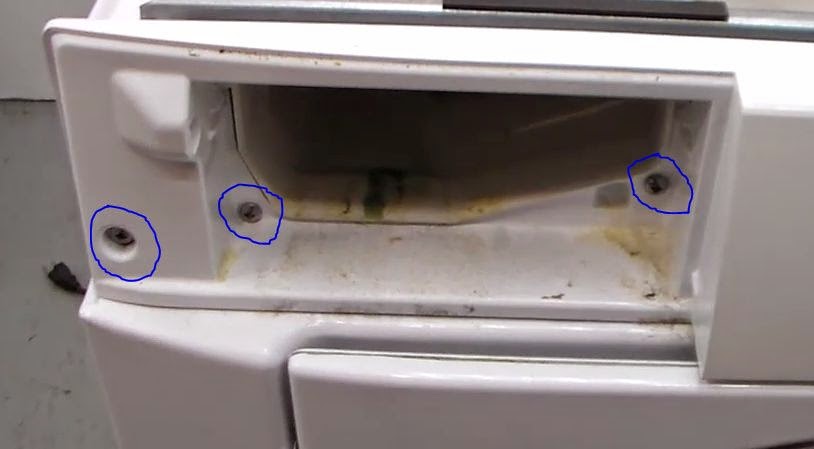
Screws Behind Dispenser
The control panel will need to come off next.  There are a series of screws that hold that thing in place.  It's a total of 5 screws all together.  First take out the soap dispenser completely and set that off to the side.  Start with the two screws up on top, then take the three out that were behind the soap dispenser.  Now just grab the top edge of the control and pull it away from washer.  It should come right off.  Now lay that on top of the washer, you shouldn't need to remove any of the wires from it.
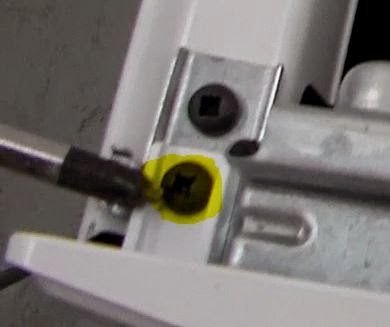
Control Panel Screw
Next thing we are going to do is take out the screws that hold the door lock assembly onto the front of the machine.  Don't worry about taking the door lock out, it can stay where it's at.  Don't worry about disconnecting the wires to it either.
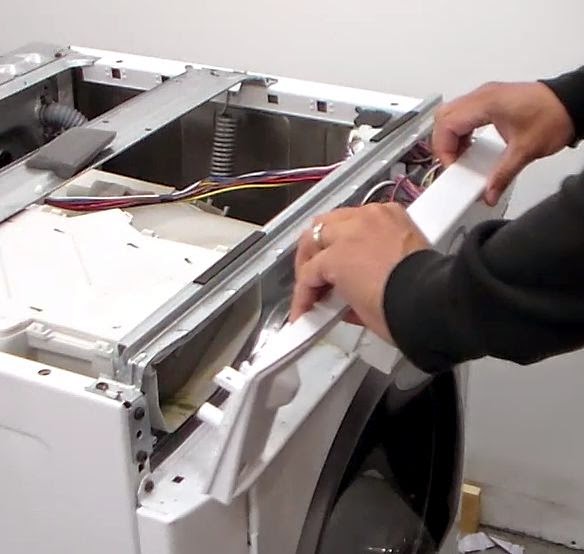
Pulling off the Control Panel
Now we will have to unhook the door gasket that's connected to the front of the washer.  This is so when we take away the front, the door bellow is not hooked to it.  There is a metal wire with a spring on it that fits around a groove on the gasket, simply grab a flat head screwdriver and pry it up, grab it and pull it off.
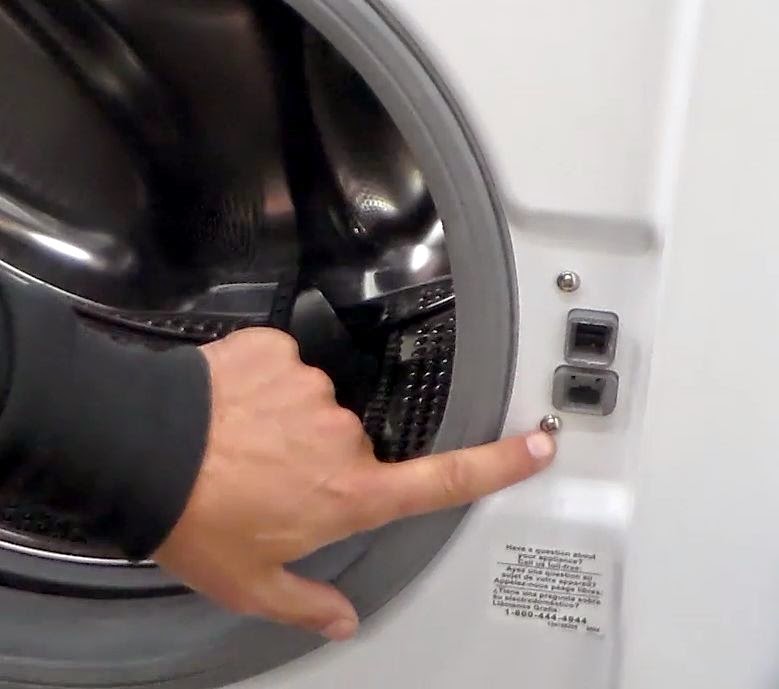
Door Lock Assembly
Now you are ready to take out the last few screws that hold the front of the washer on.  There are going to be 5 in total.  Three across the top and two at the bottom.  Once they are out you can take off the front of the washer and begin accessing the drain pump on your washer.

Two things need to be done when you have a washer that is not draining. The first thing that needs to be done is cleaning the coin trap in the drain hose that leads to the drain pump.  Most of the time this gets full of debris and prevents the washer from draining properly.  This stops all sorts of items from actually getting into the pump and causing damage.  
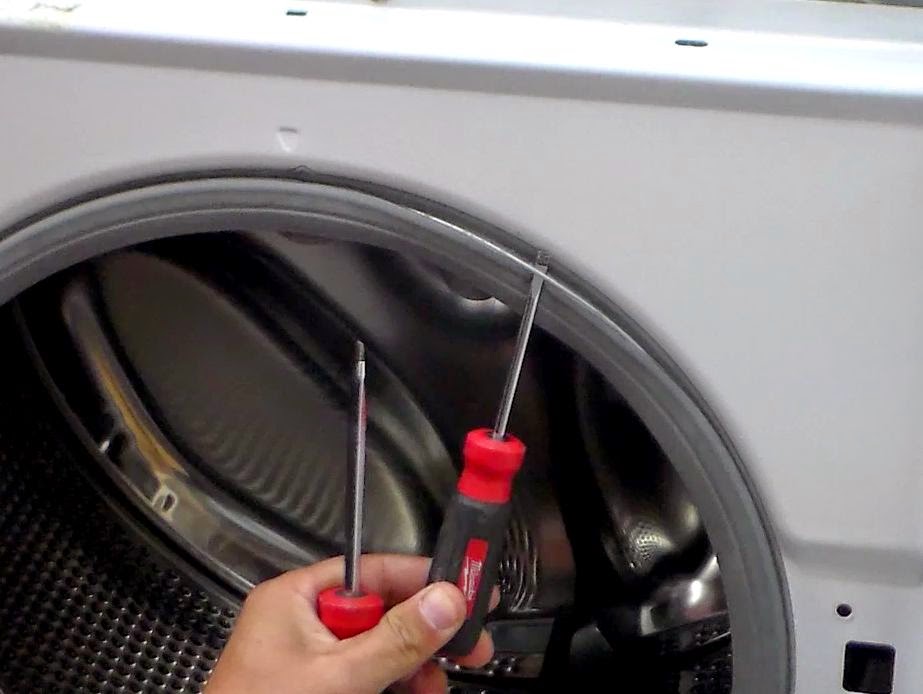
Door Gasket Removal
The second thing that needs to be done is test the drain pump.  Use a multimeter to get an ohm's reading on the motor and do a voltage test on the wires that go to the pump to make sure it's getting the proper voltage.

Once you have cleaned and tested your pump, you can put your washer back together and begin washing clothes.

Here are a couple YouTube Videos demonstrating How to Clean and How to Test your Drain Pump on a Front Load Washer.  If you have read this article it is time for you watch the videos.  The videos are on exactly what I have just talked about and they show you how to fix your washer in much better detail.


How Much Power Does a Refrigerator Use

Today's post is going to be on a question that I get asked almost on a daily basis.

How much Electricity or Energy does my refrigerator use?  


Well I'm going to try to help give you a general idea on that.

I tested a couple refrigerators I had at the shop today and this is what I found.  Most refrigerators that are over ten years old are running about 200 watts of electricity when the compressor and fans are running.
Most newer refrigerators within the last five years or so are running anywhere from about 125 - 140 watts of electricity.

Now the compressor and the fans are going to cycle on and off throughout the day.  On average the refrigerator will run roughly 50% of the time.  So using the numbers above, an older refrigerator is like leaving a 100 watt light on in your house 24 hours a day.  Newer refrigerators are like leave a 60 - 70 watt light on 24 hours a day.

Newer refrigerators are definitely more energy efficient that older ones.  Other factors that will affect these numbers are of course going to be the lights in the refrigerator.  They use power when you open the doors.  Another thing that will affect energy usage is the defrost cycles of the machines.  On newer refrigerators the defrost cycles are run only when they are needed instead of every 8 hours or so.  This will result in some energy savings over the course of a year.  Most defrost heaters will draw about 300 watts of power when they are on.

Thanks for taking the time to read this post today.  The video below shows me doing some tests on the refrigerators that I was talking about in this post.  If you could hit the "LIKE" button on the video, this helps me out.  If you have any questions about this or anything else for that matter, leave them in the comment section on this blog or in the comment section on the video.  Thanks again for taking the time and have a good day!

Refrigerator Not Cooling - What to Check

Today we are going to talk a little about Troubleshooting a Refrigerator that is not getting cold and a few things to check to get you going in the right direction in repairing the problem.

There are a couple things that need to happen for your refrigerator to get cold.  The compressor has to run, the evaporator fan has to move the air around the refrigerator to cool down the entire inside of your fridge and freezer.  There are a couple components on your refrigerator that are going to control when the compressor and the fan run.  One being the defrost timer, the other being the thermostat or also called the cold control.  I have made a couple videos explaining how to test each one of these parts and what they look like to help guide you along in your repair.  I am still going to try to explain a basic walk through of what I would do if I was at your house.

The first thing I would check to make sure the Refrigerator was getting the proper voltage.  If you open up the refrigerator and the light is on, we can move on.  If you don't have a light inside the refrigerator, test the outlet that the fridge is plugged into and make sure that there is voltage at the plug in the neighborhood of 120VAC.  Now that we have gone over that lets move on.


On a no cool refrigerator after I have determined that power is not an issue, the next thing I would do is open up the freezer door.  There are a couple things that we are going to look for.  First thing you are going to want to listen for is the fan inside the freezer.  If the fan is running, good, if not, we have to figure out why the fan is not running.  The two parts we talked about earlier are in control of the freezer fan.  


If your fan is not running, check the compressor.  It is the black round motor in the back of the refrigerator that pumps the freon through the sealed system.  Is the compressor running?  If the compressor is running and the fan is not running we need to check the evaporator fan first.  If the compressor is not running we need to check the defrost timer and the thermostat first.

First thing I'm going to go over is checking the evaporator fan.  Most fans inside your freezer are 120 VAC fans.  When the compressor is running the fan will also be receiving voltage at the same time.  You are going to need to access the evaporator fan for this test.  At this point you are going to want to unplug the refrigerator from the wall and remove the back panel of your freezer.  You are going to need to access the evaporator fan motor.  The first test is going to be seeing if the fan is good or bad.  With the refrigerator unplugged from the wall, remove the wires that are plugged into the fan and test the resistance across the two  terminals on the fan motor.  You should not read and open circuit. Normally you should read something like 100 to 125 ohms or so.  If you test the fan and have an open circuit, the fan is bad and will need replaced.  For the next test with the fan we are going to see if the fan motor is getting the correct voltage when the compressor is running.  From here you are going to place your meter on VAC so we can test the current going to to fan.  So plug the fridge back in and test the wires going to the fan motor.  Make sure you can hear the compressor running when you do this test.  If you hear the compressor running and the fan is not getting 120 volts, the defrost timer is bad.  If your refrigerator does not have a defrost timer but has an ADC board, then its bad.  The ADC board and the Defrost timer do basically the same thing.  One is mechanical the other works off a control board.

Moving on, now we are going to run some tests for a refrigerator that the compressor and the evaporator fan are not running.  You are going to want to first locate the defrost timer on your machine.  The first check is going to be to see if it's stuck in defrost.  The fridge will go into defrost about 3 times a day.  So for around 30 minutes the compressor and the fan are shut down and the heater is turned on in the freezer to clear the frost and ice off the coils behind the rear panel.  The refrigerator does this to make sure that the cold freezer air can easily circulate throughout the whole unit, keeping everything cold.  Now for the test, grab yourself a flat head screwdriver and find the dial on the defrost timer.  You want to turn the dial clockwise.  You will hear some clicking as the timer moves.  There are two distinct clicks, first one being the timer entering defrost mode and the second distinct click coming out of the defrost cycle.  If the compressor and fan come on when you turn the dial, great, now you know that you have a bad defrost timer.  Now if that didn't make the fan and compressor come on then we have to test the thermostat.  The thermostat will also shut down the fridge when it reaches the correct temperature.   However if its defective, then it will shut down the goodies when it's not supposed to.  How to test the thermostat is pretty simple.  Unplug the fridge from the wall, remove the two wires that plug into the thermostat.  With the thermostat set to the factory setting, the midway point or so,  test the resistance across the two terminals.  If the thermostat is bad, it will read an open circuit.  If the thermostat is reading a closed circuit, then the timer is bad and not letting any voltage reach either the fan or the compressor.

Thanks for taking the time to read this post and watch some videos.  I hope that the information in here has helped you locate the problem with your refrigerator and you are able to fix it.  If you have any questions or need some more help, I try to answer all my comments on my posts, either with a new post or in the comments themselves, so leave a comment with any questions you have or let me know if this helped you out.  Make sure you thumbs up the videos and add them to your favorites, that helps me out alot.

Good Luck with your repair, I hope I was able to save you some money by you not having to call out a professional.


Washer Overflowing / Overfilling How to Fix

So the problem is you loaded up your washer, turned the dial to start, then you flooded your laundry room.  That is never a good day.  Lets talk a little about what happened and how to troubleshoot this problem to find out what malfunctioned on your washer to let this happen.

There are a couple things that control the water coming into your washer.  The first thing is going to be the water inlet valve.  Basically how this works is you set the washer to fill with either hot, warm or cold water.  When you turn the timer on, the temperature selector switch is going to tell which valve to open and let the water in.  The timer only says it needs water, the temperature selector switch controls which valve lets it in.  Basically the water valve is going to get 120 VAC, the solenoid will open and water will flow.


Normally when a water valve goes bad it will not let water in at all when it receives the voltage from the temp switch.  However, it is possible that the valve has stuck open and is not able to close when the voltage is removed.  You will know if the valve is stuck open because the only way you will get the water to stop going into the washer is to shut the water supply off to the washer.  So to make this clear, you will be able to unplug the washer from the wall and water will continue to flow into the machine if the water supply is turned on.  Got it?


Now, if you push the timer knob in and the water stops flowing into the washer you have a different problem than what we just went over.  This check is going to bring your attention to the pressure switch and the pressure switch hose.  The pressure switch is going to be whats attached to the load size knob.  How this works is, as the washer fills with water, air gets trapped inside the pressure switch hose.  As the water level rises the pressure inside the hose becomes greater.  So if you set the washer to a small load, it only takes a little pressure inside the hose to tell the pressure switch to cut the water off and tell the timer to agitate.  If you set the load size for a large load, it will take a lot more pressure for the pressure switch to cut the water and tell the timer to move on.  The pressure switch hose is attached to the bottom of the wash tub and runs up and connects to the pressure switch.  


Let's say you overloaded your washer and it was banging around and you didn't catch it right away.  You hear the machine going nuts, run down fix the load so its balanced and bounce.  The washer still has to go through a rinse cycle or two.  Because your machine was off balance and shoot violently, it could have ripped off the pressure switch hose that's attached to the bottom of the tub.  Now air cannot be trapped inside the tube and your pressure switch is not going to have any idea how much water is in there.


Sometimes the a hole can develop in the hose from rubbing on the frame somewhere over years of use.  If that happens that will leave out the pressure and you'll overflow your washer.  If you have a problem with the switch or hose, the water will shut off to the washer simply by pressing in on the timer knob.


Please make sure you watch the video on this page.  This is me explaining what I've gone over here in this article.  Plus you get to see how to troubleshoot each part on your washer so you'll be able to tell if the hose is bad, or if the valve is bad and how to diagnose each part the controls the flow of water in your washer.


The last thing you want to have is a washer that overflows, but if you did and that's what brought you hear, I hope I was able to help you solve your problem and point you in the right direction getting you washer back up and running like it should be.


Be sure to give the video a "Thumbs UP"  hit the "LIKE" button.  Leave some comments either on this post or on the videos main page.  I will do my best to answer your questions.  Thanks for taking the time to read this and good luck with your Appliance Repair!